WD 4WD 4 S KWD 4 / KWD 4 S
59510240 (12/21)
59510240 (12/21)
 Read these original operating instructions and the enclosed safety instructions before using the device for the first time. Proceed accordingly.
Keep both books for future reference or for future owners.
Only use the device in private households.
In accordance with the descriptions and the safety information in these operating instructions, the device is intended for use as a wet and dry vacuum cleaner.
Cold ashes may only be vacuumed with suitable accessories.
Protect the device from rain and do not store it outdoors.
The manufacturer accepts no liability for possible damage caused by improper use or incorrect operation.
 The packing materials can be recycled. Please dispose of packaging in accordance with the environmental regulations.
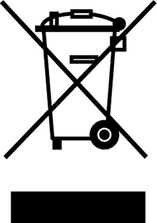 Electrical and electronic appliances contain valuable, recyclable materials and often components such as batteries, rechargeable batteries or oil, which - if handled or disposed of incorrectly - can pose a potential threat to human health and the environment. However, these components are required for the correct operation of the appliance. Appliances marked by this symbol are not allowed to be disposed of together with the household rubbish.
Current information on content materials can be found at: www.kaercher.com/REACH
Only use original accessories and original spare parts. They ensure that the appliance will run fault-free and safely.
Information on accessories and spare parts can be found at www.kaercher.com.
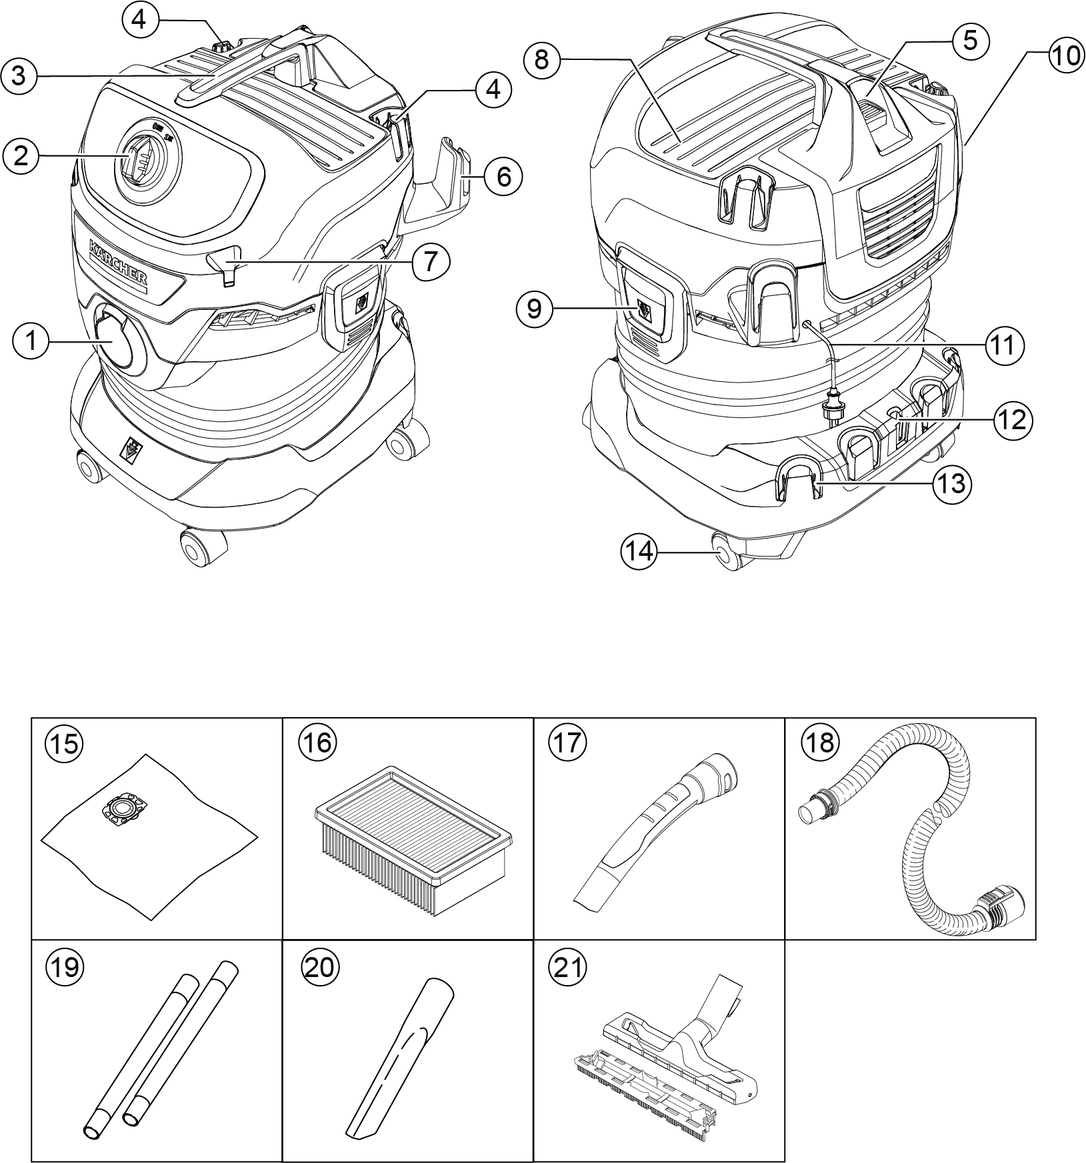
The scope of delivery for the appliance is shown on the packaging. Check the contents for completeness when unpacking. If any accessories are missing or in the event of any shipping damage, please notify your dealer.
The warranty conditions issued by our relevant sales company apply in all countries. We shall remedy possible malfunctions on your appliance within the warranty period free of cost, provided that a material or manufacturing defect is the cause. In a warranty case, please contact your dealer (with the purchase receipt) or the next authorised customer service site.
(See overleaf for the address)
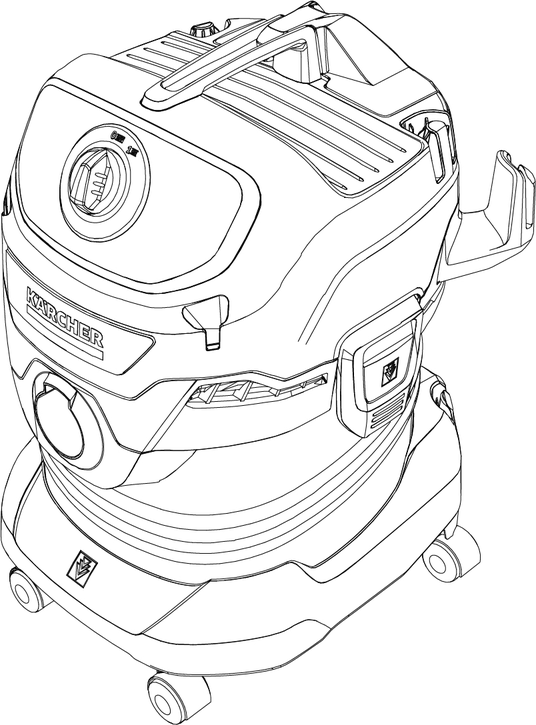
Depending on the model selected, there are differences in the equipment. The specific equipment is described on the device packaging.
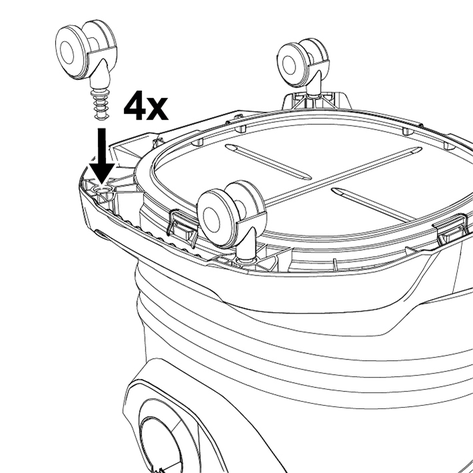
Before initial startup, remove the contents from the container and mount the steering rollers.
For versions with stainless steel tubes, remove the protective cover before initial startup.
Fully unfold the filter bag.
Attach the filter bag to the device connection and press it on firmly.
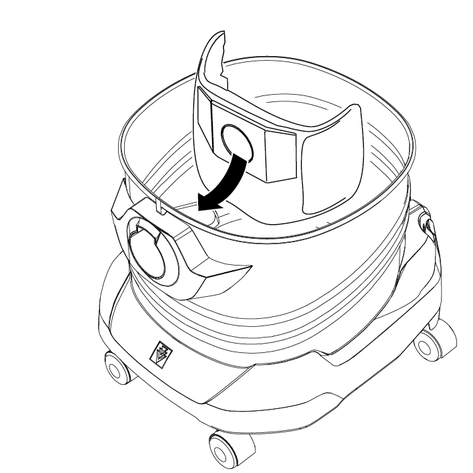
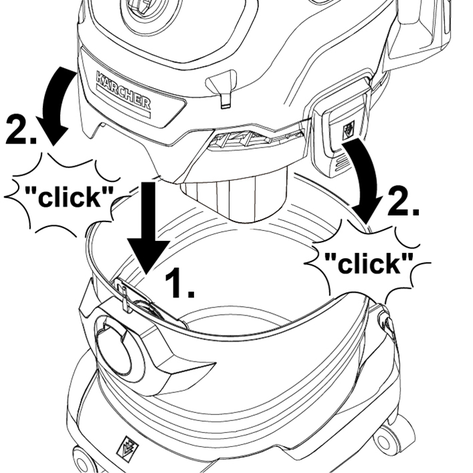
Fit and lock the device head.
We recommend using a filter bag to vacuum fine dust.
Fully unfold the filter bag.
Attach the filter bag to the device connection and press it on firmly.
Fit and lock the device head.
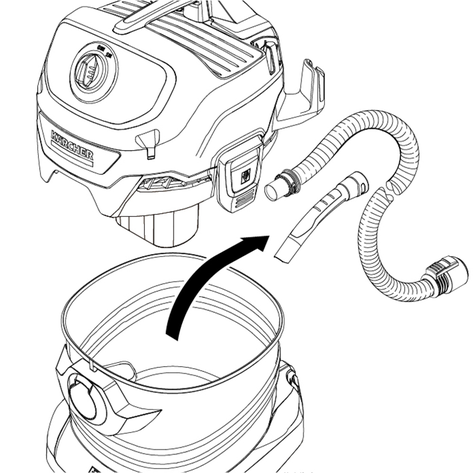
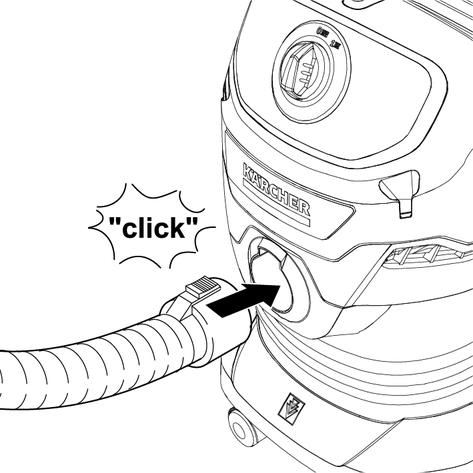
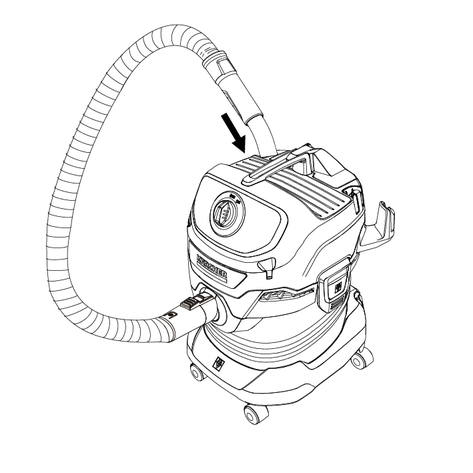
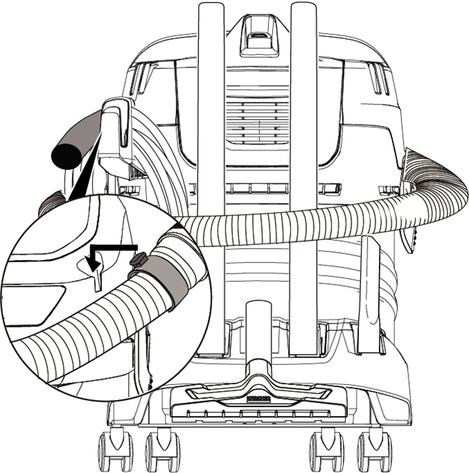
Connect the suction hose.
Connect the suction hose to the handle.
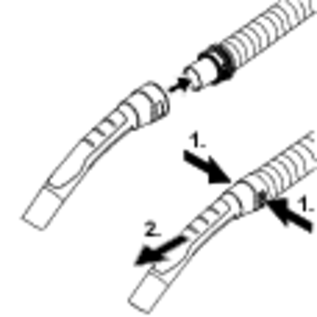
For convenient vacuuming in confined spaces, the handle can be removed, and the accessories plugged directly onto the suction hose.
To release the handle, the grey areas on both sides of the handle must be pressed, and the handle pulled from the hose.
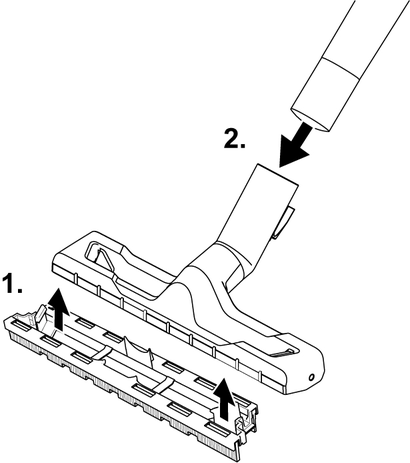
Install the floor nozzle.
Install the insert in the floor nozzle.
Connect the floor nozzle to the suction pipes.
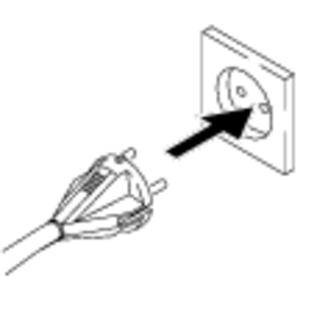
Plug the mains plug into the socket.
Set the trigger into the desired position.
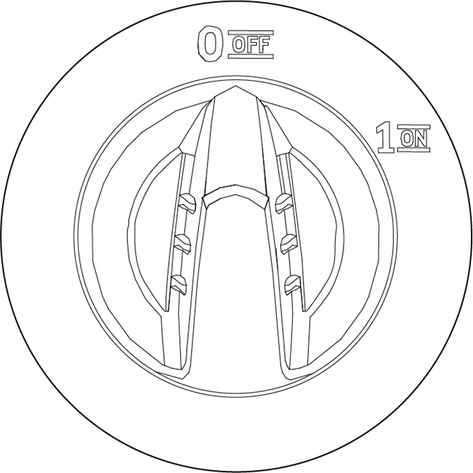
Position "1 ON": The device is switched on.
Position "0 OFF": The device is switched off.
Limited for Switzerland only: The socket outlet shall only be used during operation in dry condition.
Flat pleated filter missing
Device damage
Always work with the flat pleated filter inserted.
Pay attention to the latest part numbers when purchasing and installing filter bags and flat pleated filters.
Information on accessories and spare parts can be found at www.kaercher.com.
Vacuuming cold ashes
Device damage
Only vacuum cold ash with an ash pre-separator.
Defective or wet flat pleated filter
Device damage
Before initial startup, check the flat pleated filter for damage and replace it if necessary.
Only vacuum with a dry flat pleated filter.
Replace the filter bag in good time, as a filter bag that is too full could be damaged. The fill degree of the filter bag depends on the amount of dirt vacuumed. The filter bag should be replaced more frequently when vacuuming fine dust, sand, etc.
Wet vacuuming with a filter bag
Device damage
Do not use a filter bag when vacuuming wet.
Operation with full container
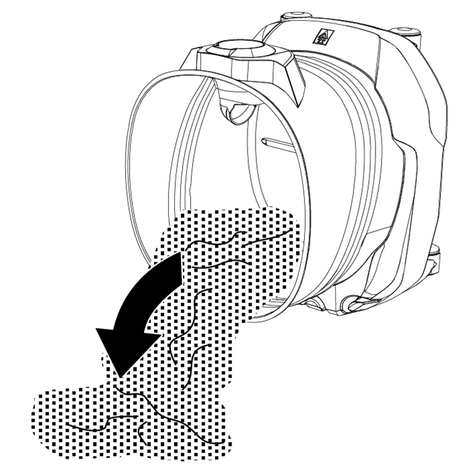
When the container is full, a float switch closes the suction opening and the device runs at a higher speed.
Switch off the device immediately and empty the container.
If the device falls over, the float can also close. To make the device capable of vacuuming again, set up the device, switch it off, wait 5 seconds and then switch it on again.
Set the trigger to "0 OFF".
The device is switched off.
Variant 1: Place the handle of the suction hose in the intermediate parking position.
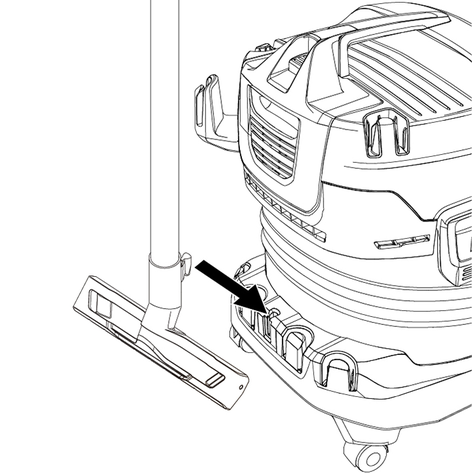
Variant 2: Attach the floor nozzle in the parking position.
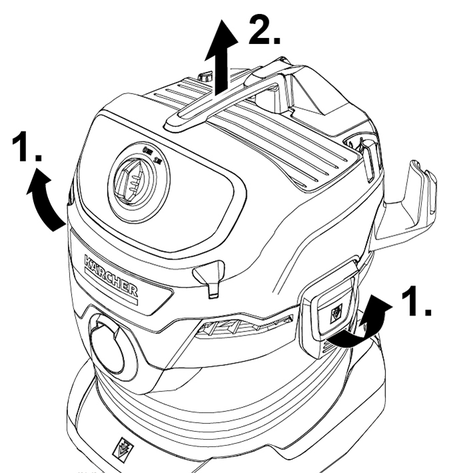
Set the trigger to "0 OFF".
The device is switched off.
Pull out the mains plug.
Remove the device head.
Empty the container.
Storage possibility:
The suction hose can be wrapped around the device head and attached to the device head with the help of the hose collar.
Store the device in a dry and frost-proof room.
Clean the device and plastic accessory parts with a commonly available plastic cleaner.
Rinse the container and accessories with water, as necessary, and dry them before further use.
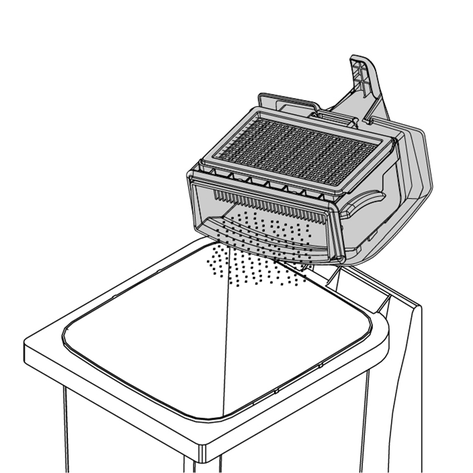
Unlock the filter box and fold it out.
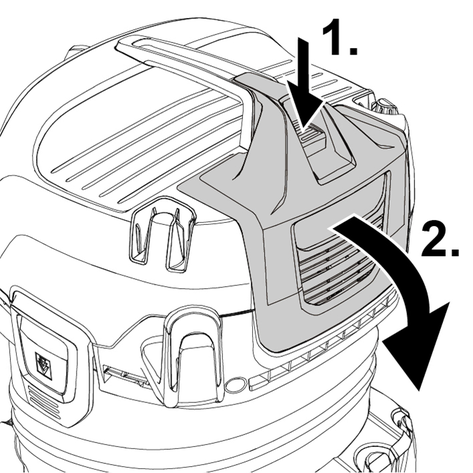
Remove the filter box.
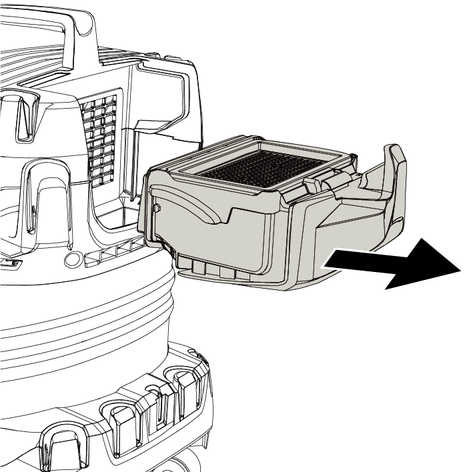
Empty the filter box into a waste container. In the case of heavy soiling, tap the filter box against the edge of the waste container. The flat pleated filter does not have to be removed from the filter box.
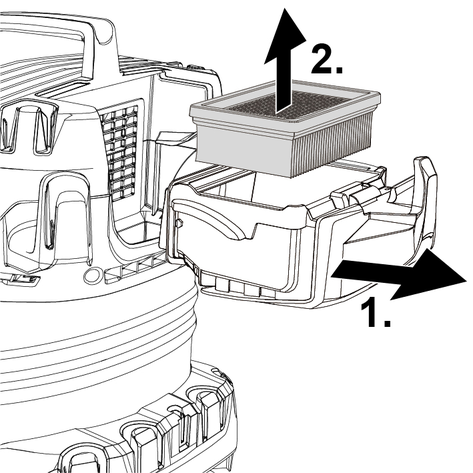
If necessary, clean the flat pleated filter separately.
To do this, remove the flat pleated filter from the filter box.
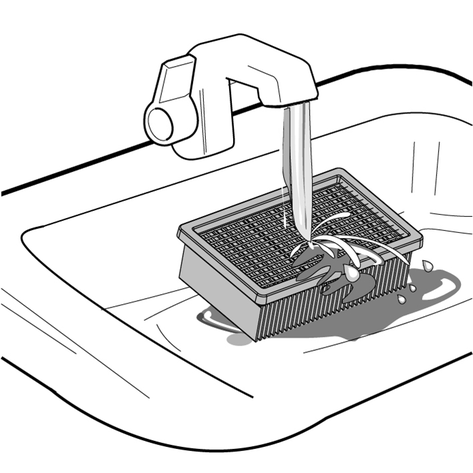
Clean the flat pleated filter under running water. Do not rub or brush off.
Allow the flat pleated filter to dry completely before reusing.
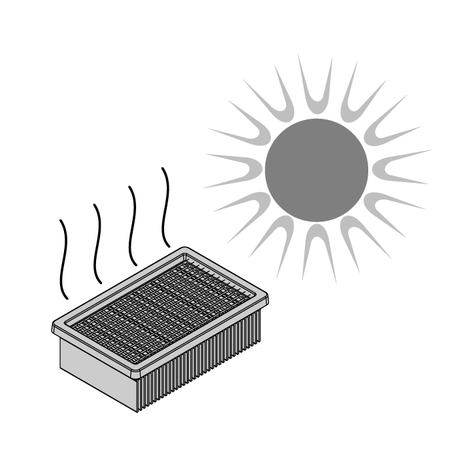
We recommend cleaning the flat pleated filter after each use.
Malfunctions often have simple causes that you can remedy yourself using the following overview. When in doubt, or in the case of malfunctions not mentioned here, please contact your authorised Customer Service.
Declining suction performance
Cause:
Accessories, the suction hose or the suction tubes are clogged.
Remedy:
Remove the clog with a suitable aid.
Cause:
The filter bag is full
Remedy:
Replace the filter bag.
Cause:
The flat pleated filter is dirty.
Remedy:
Clean the flat pleated filter (see Chapter Clean the filter box / flat pleated filter).
Cause:
The flat pleated filter is damaged.
Remedy:
Replace the flat pleated filter.
Electrical connection | |
Mains voltage | 220 - 240 V |
Power protection (slow-blowing) | 10 A |
Nominal power | 1000 W |
Power cable type | H 05VV-F2x0,75 |
Cable length | * 5/6 m |
Device performance data | |
Tank content | 20 l |
Water absorption with handle | 12 l |
Water absorption with floor nozzle | 10 l |
Dimensions and weights | |
Weight (without accessories) | * 6,7 - 7,7 kg |
Sound level (EN 60704-2-1) | 72 dB(A) |
The technical data can be found on the type plate.