2.853-135.0 KM 100/120 R G
59991580 (01/23)
59991580 (01/23)
Read these original operating instructions and the original operating instructions of the machine before using the device for the first time.
Act in accordance with them.
Keep all operating instructions for future reference or for future owners.
Indication of an imminent threat of danger that will lead to severe injuries or even death.
Indication of a potentially dangerous situation that may lead to severe injuries or even death.
Indication of a potentially dangerous situation that may lead to minor injuries.
Indication of a potentially dangerous situation that may lead to damage to property.
Disconnect the battery before working on the electrical system.
Before cleaning, maintenance, replacing parts and resetting to another function, you must switch off the device and remove the ignition key.
Repairs may only be carried out by approved customer service sites or staff qualified in this area who are familiar with all relevant safety instructions.
Adhere to the safety inspection requirements for mobile devices for industrial use in accordance with the locally applicable regulations (e.g. in Germany: VDE 0701).
Short-circuits or other damage. Do not clean the device with a hose or high-pressure water jet.
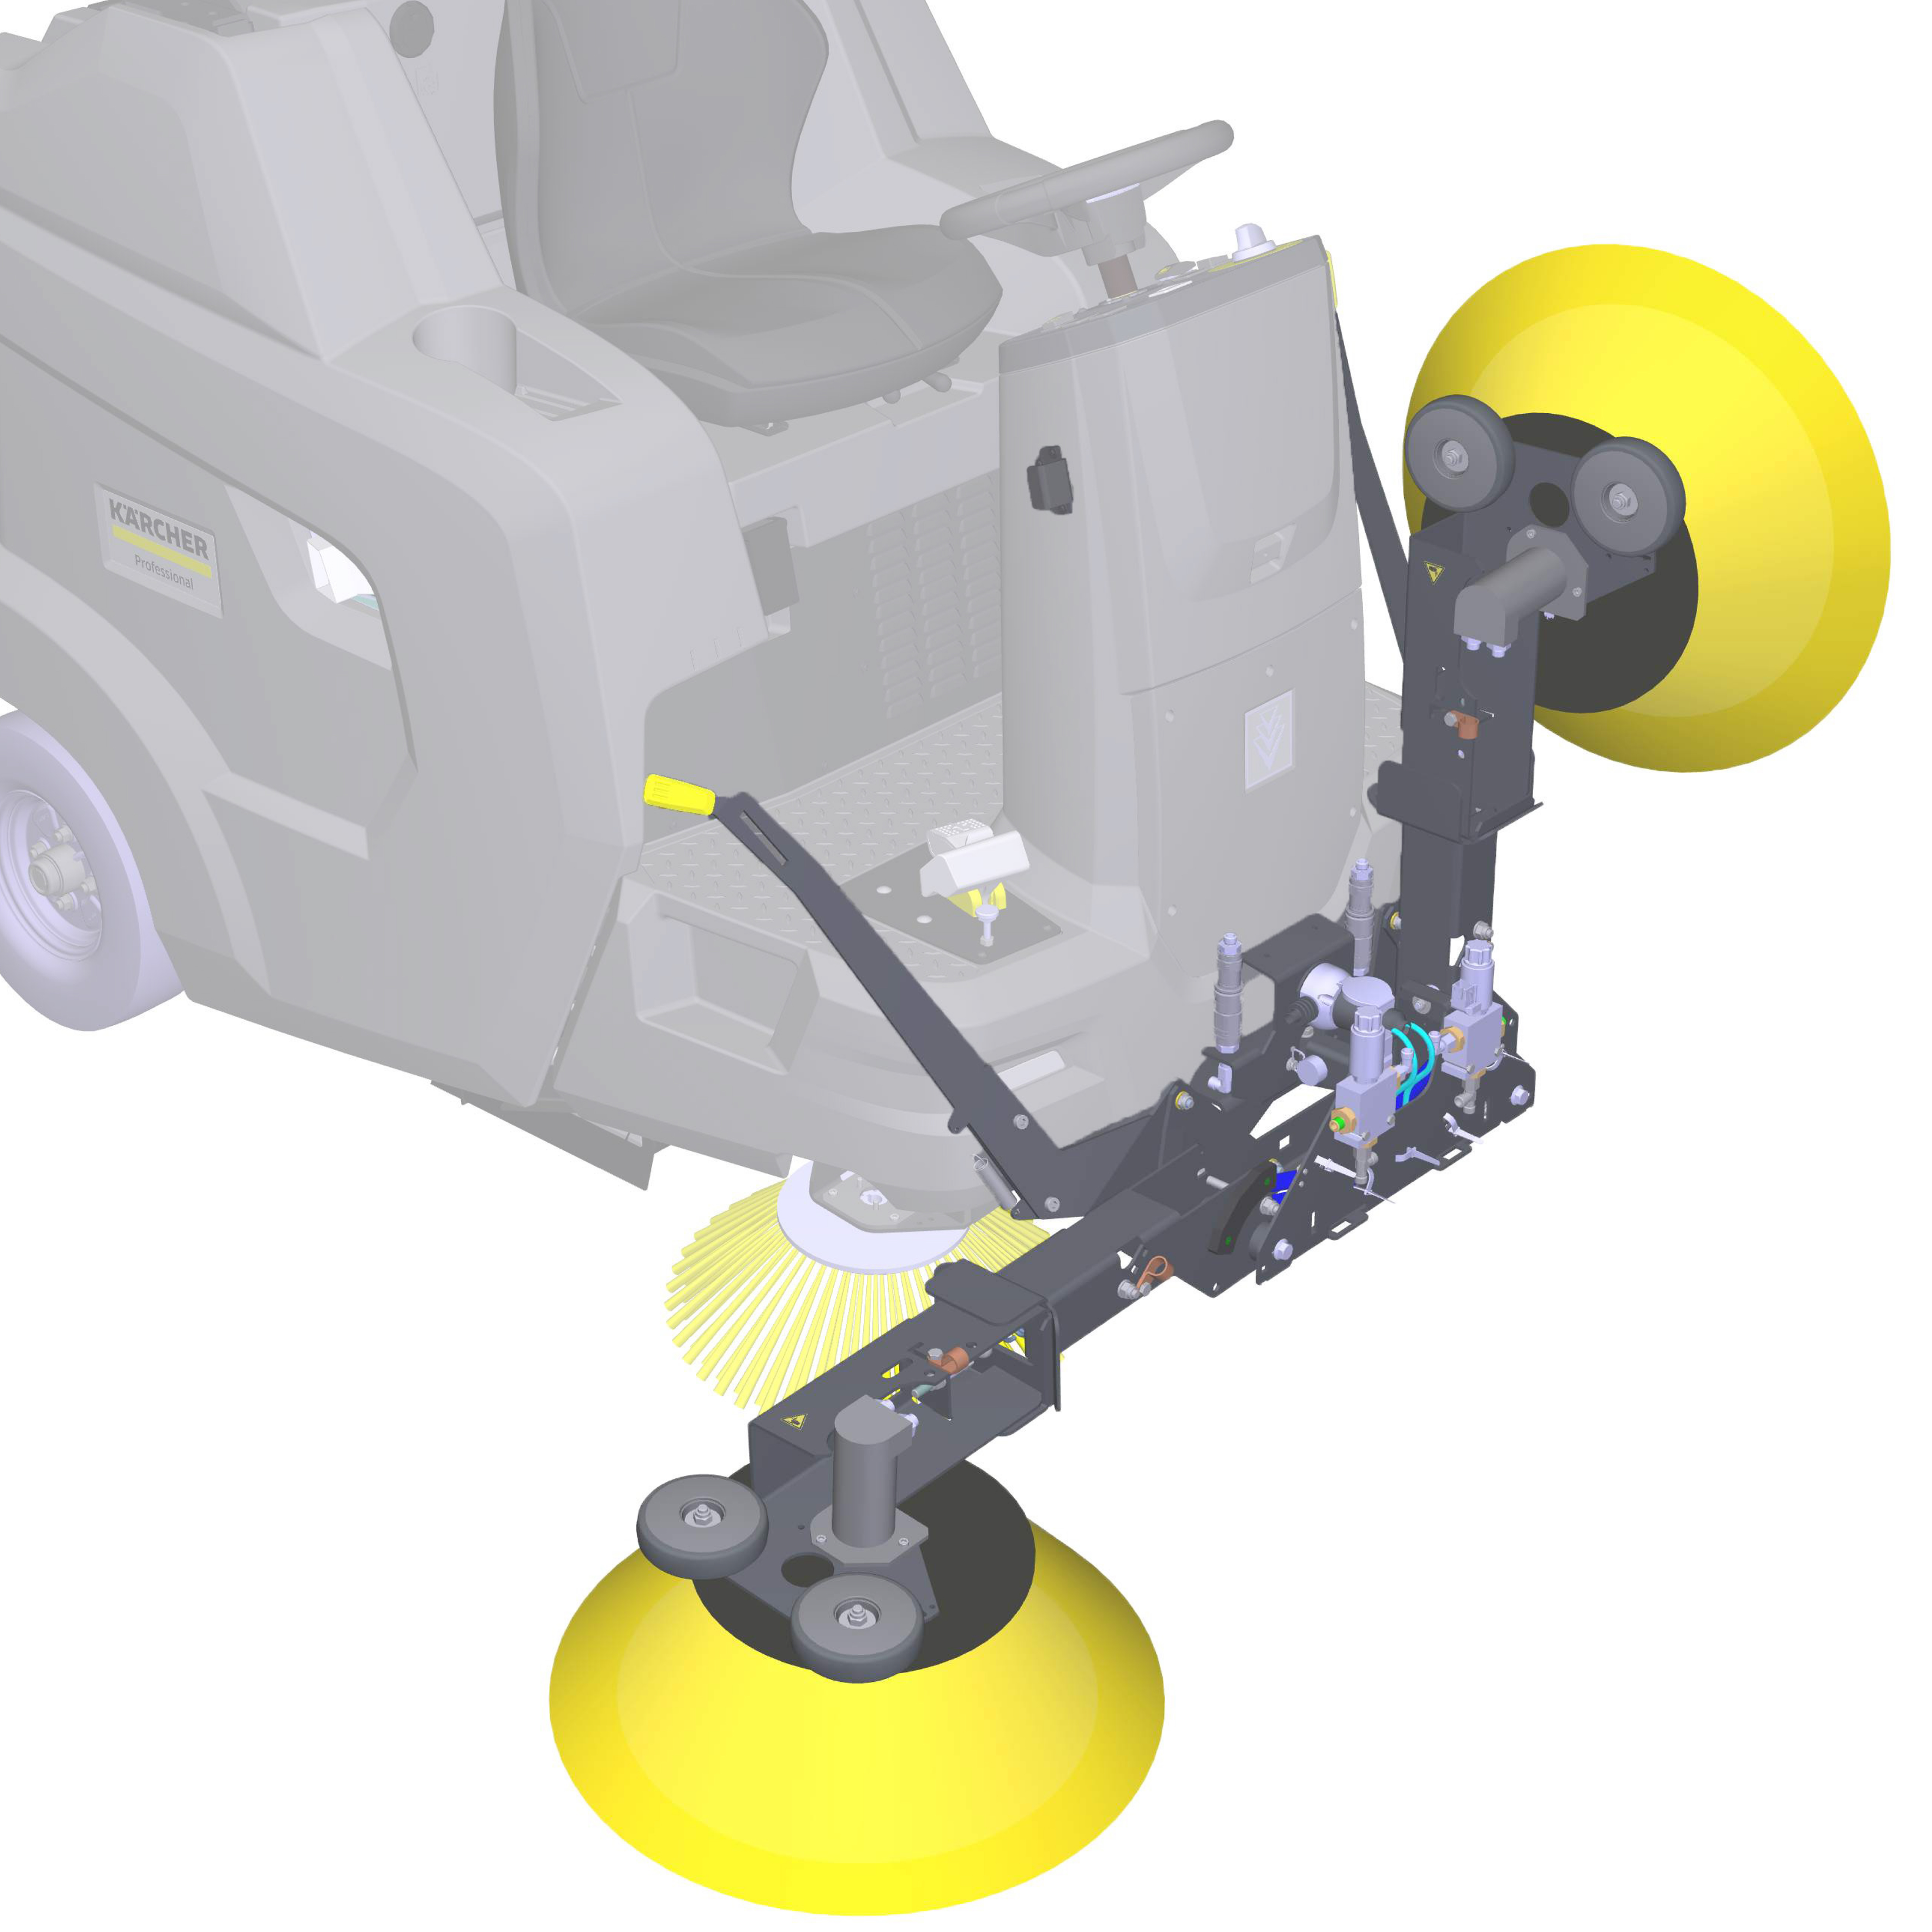
These operating instructions describe the mounting and dismounting as well as the handling of the additional side brush attachment kit.
The additional side brush attachment kit may only be used for the intended use, as illustrated and described in these operating instructions. Any other use is considered as improper use.
Using the additional side brushes increases the working width on one or both sides of the machine.
This special option is available for the following machines:
KM 100/120 R G
The additional side brush attachment kit must not be fitted to other machines.
During operation with one or both additional side brushes, the flashing beacon must be switched on.
 The packing materials can be recycled. Please dispose of packaging in accordance with the environmental regulations.
 Electrical and electronic devices contain valuable, recyclable materials and often components such as batteries, rechargeable batteries or oil, which - if handled or disposed of incorrectly - can pose a potential danger to human health and the environment. However, these components are required for the correct operation of the device. Devices marked by this symbol are not allowed to be disposed of together with the household rubbish.
Current information on content materials can be found at: www.kaercher.de/REACH
Only use original accessories and original spare parts. They ensure that the appliance will run fault-free and safely.
Information on accessories and spare parts can be found at www.kaercher.com.
When unpacking the device, use the operating instructions to check the contents of the box for completeness and for damage . Please contact your dealer if any parts are missing or in the event of any shipping damage.
Using the additional side brushes increases the working width on one or both sides of the machine.
The rotating additional side brushes clean corners and edges of the sweeping surface and convey the waste into the path of the side brushes, which then convey the waste into the path of the roller brush.
Optionally, the left, the right, both or neither of the additional side brushes can be used.

Attaching the device to the machine
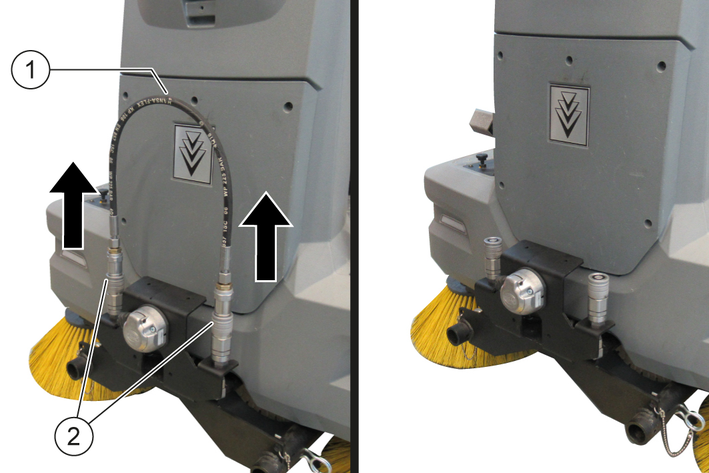
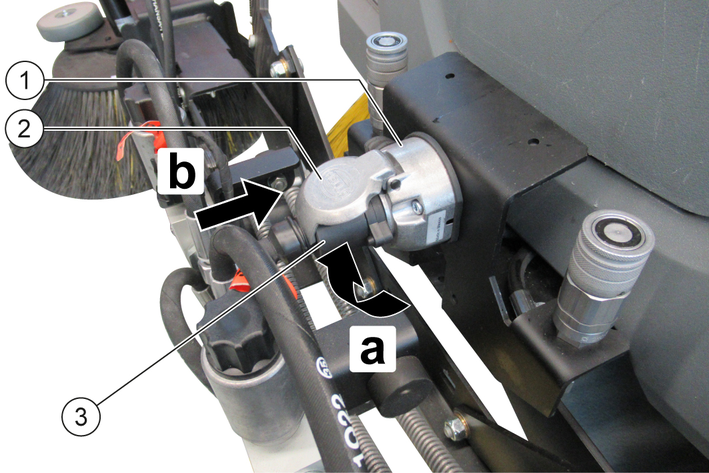
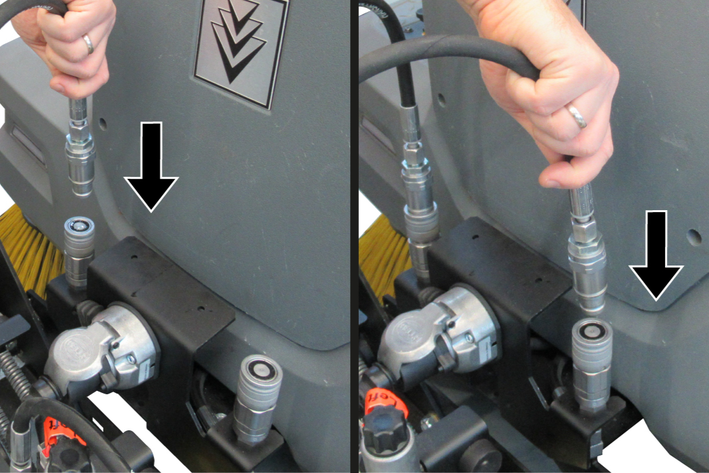
Release the hydraulic couplings and remove the hydraulic hose.
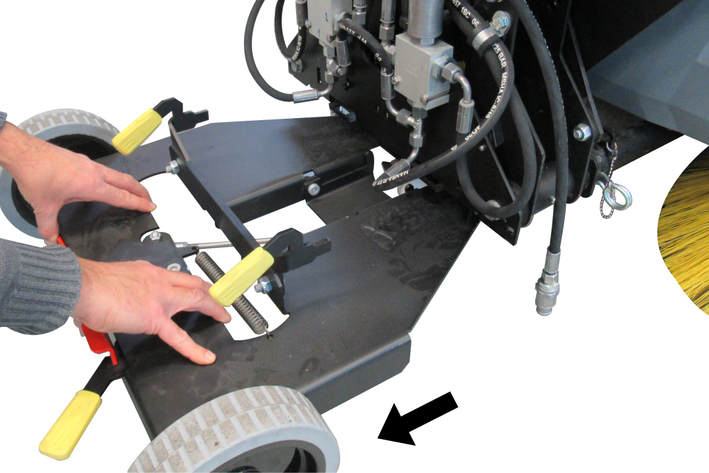
Move the device with the transport trolley centrally in front of the machine.
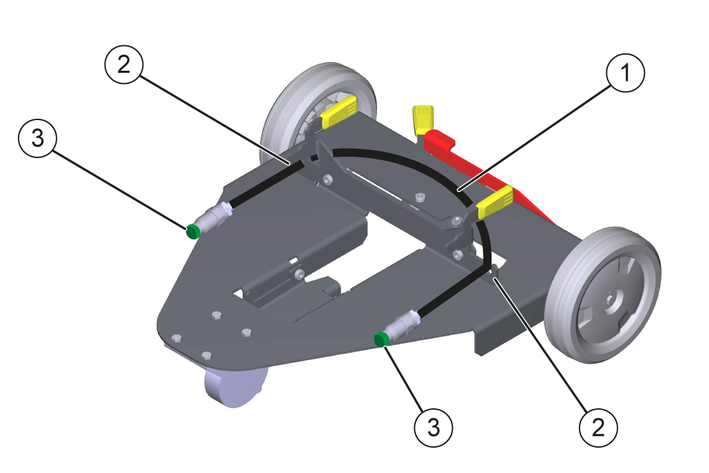
Insert the bolts into the mounting tubes and push the transport trolley against the machine as far as it will go.
Guide the trolley by the handles and tilt it slightly if necessary.
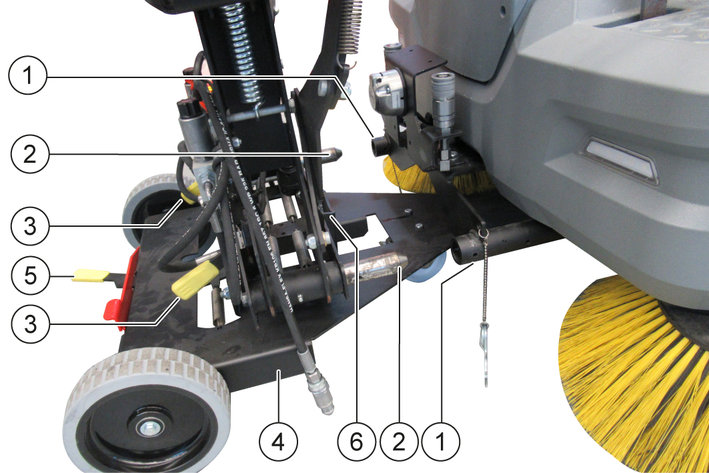
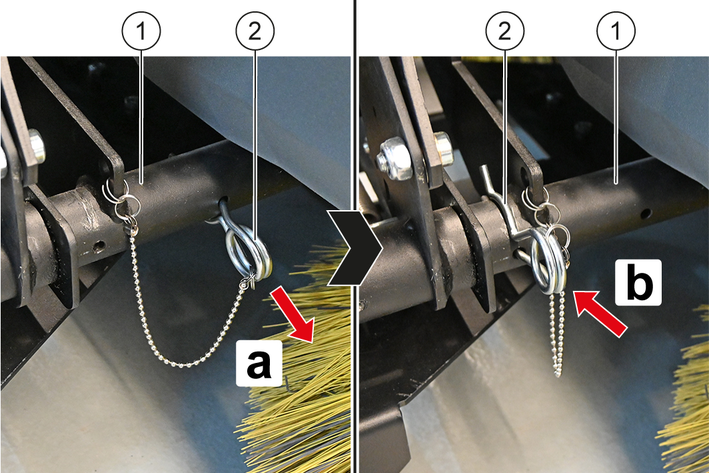
Pull the spring pin out of the rear hole on the left and right mounting tube and insert it into the front hole.
The device is secured to the machine.
Hook the left and right hand levers into the hand lever holders.

Pivot the pawl upwards and push the retaining claw lever to the right as far as it will go.
The retaining claw of the transport trolley is unhooked at the rear of the device.
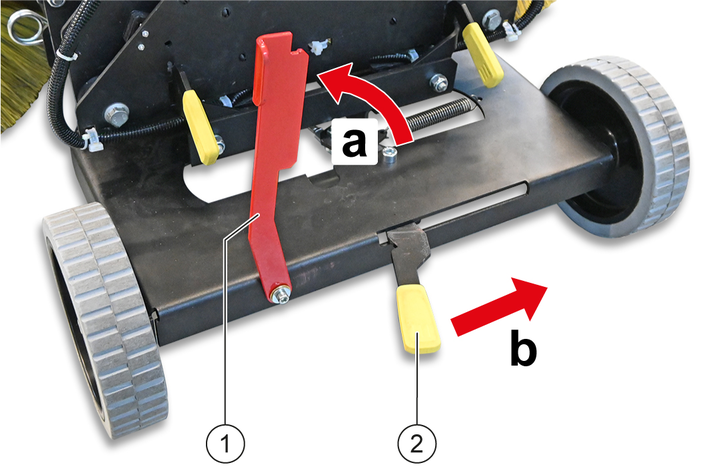
Pivot the pawl downwards.
The retaining claw lever is secured in the release position.
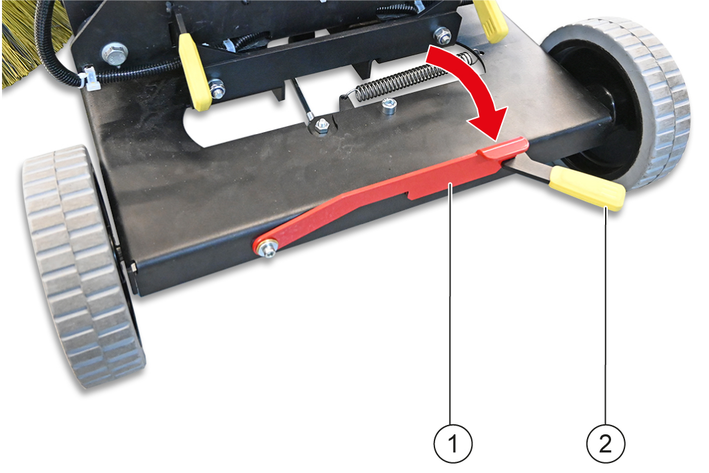
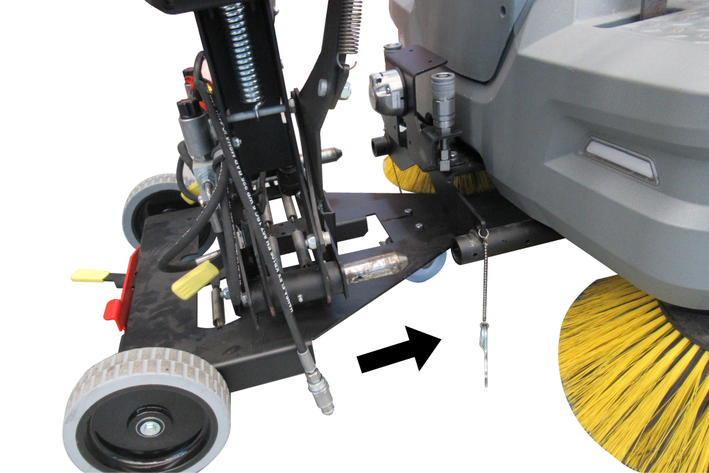
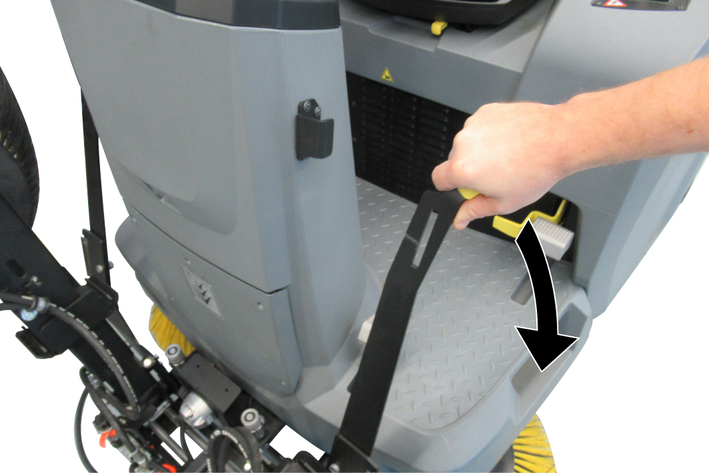
Pull the transport trolley out to the rear.
Lower the brushes on both sides.
Lift the socket cover and insert the device plug into the socket.
Release the socket cover.
The device plug is secured in the socket to prevent it from falling out.
Insert the two hydraulic hoses into the respective hydraulic coupling.
Attach a dust protection cap to each end of the hydraulic hose removed in step 1 and attach to the holder on the transport trolley.
Raise the brushes on both sides.
Removing the device from the machine
Removal is performed in the reverse sequence.
Risk of damage when driving the machine with the transport trolley attached!
Driving the machine with the transport trolley attached can cause damage to the machine, transport trolley and additional side brushes.
After attaching the additional side brushes, remove the transport trolley.Do not drive the machine with the transport trolley attached.Check whether the transport trolley on the additional side brush is removed, otherwise remove the transport trolley, see chapter Attaching/removing the device to/from the machine.
Risk of damage if the additional side brushes are not switched on and lowered!
When using the "Driving" or "Sweeping with roller brush" program, the lowered additional side brushes are not switched on and thus wear on one side during operation.
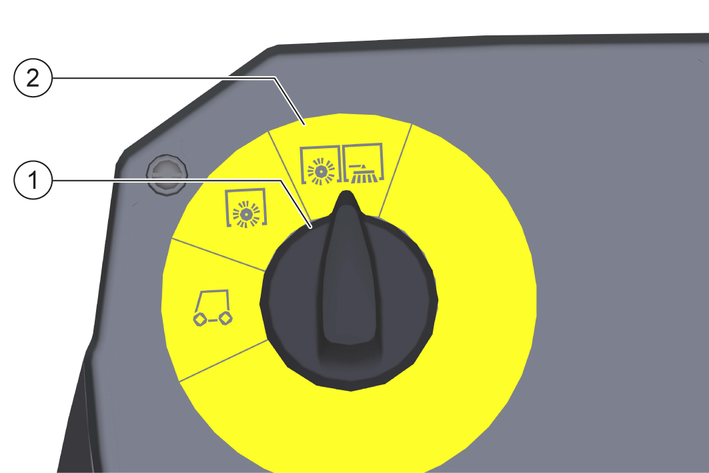
Use the additional side brushes only in conjunction with the "Sweeping with roller brush and side brushes" program.Fold both additional side brushes upwards before switching on the "Driving" or "Sweeping with roller brush" program.Set the program selection switch to "Sweeping with roller brush and side brushes".
Risk of injury and damage!
There is a risk of injury and damage when lowering and lifting the additional side brushes!
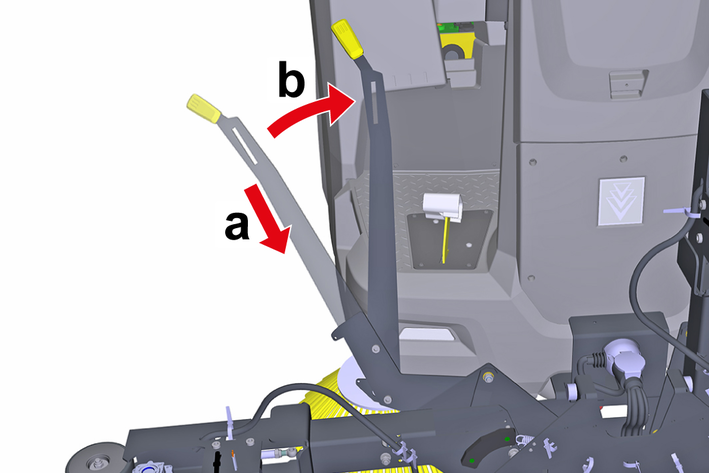
Make sure that no persons or animals are in the swivel range of the additional side brushes when lowering and lifting.Do not let the additional side brushes fall down, but lower them carefully with the hand lever.Fold down the right or left additional side brush.
Unhook the corresponding hand lever on the hand lever holder.
Use the hand lever to carefully lower the additional side brush to the ground.
The motor of the additional side brush switches on automatically.
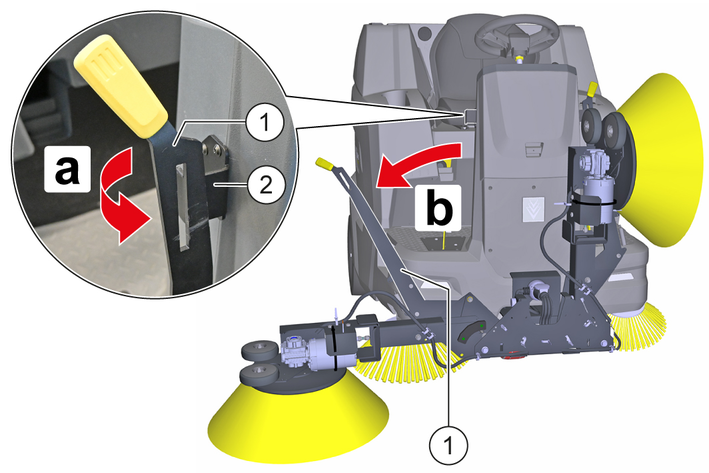
Press the hand lever down and pivot it inwards.
If necessary, fold down the other additional side brush in the same way.
Press the accelerator pedal and carry out the surface cleaning.
The additional side brushes are folded up in the reverse order.
Adhere to the safety instructions for care and maintenance at the beginning of these operating instructions.
Short-circuits or other damage. Do not clean the device with a hose or high-pressure water jet.
Improper cleaning
Risk of damage.
Do not use any abrasive or aggressive detergents.Switch off the machine, see the operating instructions for the machine.
Clean the device with a cloth moistened with mild washing lye.
The following maintenance work must be carried out by a qualified specialist, consult a Kärcher specialist dealer or Service provider if necessary.
Weekly:
Switch off the machine and remove the key from the key-operated switch, see chapter "Switching off the machine" in the machine operating instructions.
Check all moving parts for ease of motion and have them lubricated or repaired if necessary.
Check the additional side brushes for wear and damage and replace if necessary, see chapter Checking/removing/installing the additional side brushes.
The floating bearing of the additional side brushes ensures that the sweeping pattern automatically adjusts itself when the bristles are worn.
Switch off the machine and remove the key from the key-operated switch, see chapter "Switching off the machine" in the machine operating instructions.
Check:
Check the additional side brushes for wear, damage and wrapped flexible objects such as ribbons, cords, etc. Replace the additional side brushes if it is worn, damaged or the cleaning result is not satisfactory, or remove wrapped objects.
Removal:
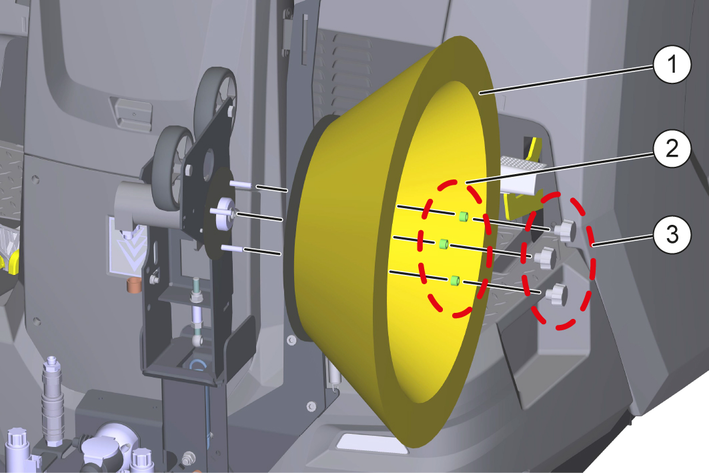
Unscrew the star grip nuts.
Pull off the spacer sleeves.
Remove the additional side brush.
Clean the additional side brush holder.
Installation:
Attach the new additional side brush to the additional side brush holder.
Push on the spacer sleeves.
Manually tighten the star grip nuts.
Risk of injury and damage when working on live parts!
Working on live parts of the machine may result in injury from electric shock and damage to the machine.
Switch off the machine, disconnect the mains plug of the charger from the mains socket and disconnect the power supply to the machine before carrying out inspection, maintenance or cleaning work.Have repairs to live components carried out only by an authorised customer service.Risk of injury due to sudden start-up of motors and systems!
When the machine is switched on, motors or systems can start abruptly and cause injuries due to e.g. jamming, crushing or shearing.
Switch off the machine and remove the key from the key-operated switch before carrying out any inspection, maintenance or cleaning work.You can remedy minor faults using the following overview.
Contact the Service department in the case of any faults not listed!
The cleaning result is unsatisfactory.
Cause:
The additional side brushes are worn out.
Remedy:
Replace the additional side brushes, see chapter Checking/removing/installing the additional side brushes.
Additional side brushes do not rotate.
Cause:
The additional side brushes are not folded down completely.
Remedy:
Fold down the additional side brushes completely.
Cause:
The setting knob for side brush speed is not in the "Max" position.
Remedy:
Turn the setting knob for the side brush speed to the "Max" position, see chapter Operation.
Cause:
The "Driving" or "Driving with roller brush" program is set.
Remedy:
Set the program selection switch to "Sweeping with roller brush" or "Sweeping with roller brush and side brushes", see chapter Operation.
Cause:
The power supply to the device is interrupted.
Remedy:
Insert the device plug into the mains socket as far as it will go and secure it with the socket cover.
Cause:
The power supply to the machine is interrupted.
Remedy:
Establish the power supply, see chapter "The machine does not drive" in the operating instructions of the machine.
Cause:
The additional side brushes are blocked.
Remedy:
Check the additional side brushes for wrapped, flexible objects such as ribbons, cords etc. and remove them, see chapter Checking/removing/installing the additional side brushes.
Cause:
The hydraulic hoses are not connected.
Remedy:
Insert the hydraulic hoses into the respective hydraulic coupling, see chapter Attaching/removing the device to/from the machine.
Wear parts | Description/note | Order no. |
|---|---|---|
Side brushes, Standard | For indoor and outdoor surfaces | 5.032-966.0 |
The warranty conditions issued by our relevant sales company apply in all countries. We shall remedy possible malfunctions on your appliance within the warranty period free of cost, provided that a material or manufacturing flaw is the cause. In a warranty case, please contact your dealer (with the purchase receipt) or the next authorised customer service site.
Further information can be found at: www.kaercher.com/dealersearch
Further warranty information (if available) can be found in the service area of your local Kärcher website under "Downloads".
Device performance data | |
Working width with 1 additional side brush | 1515 mm |
Working width with 2 additional side brush | 2280 mm |
Theoretical surface performance | |
Surface coverage with 1 additional side brush | 9090 m2/h |
Surface coverage with 2 additional side brushes | 13680 m2/h |
Dimensions and weights | |
Length | 690 mm |
Width to bristle end with new additional side brushes | 2280 mm |
Width of the fixed parts | 2030 mm |
Height | 880 mm |
Weight | 64 kg |
Diameter of side brush | 600 mm |
Additional side brush motor (electric) | |
Engine type | Hydraulic motor |
Type | OMM50 |

2-2-SC-A4-GS-17339