LVS 1/1 BpLVS 1/2 Bp
(09/24)
(09/24)
 Lesen Sie vor der ersten Benutzung des Geräts diese Originalbetriebsanleitung und die beiliegenden Sicherheitshinweise. Handeln Sie danach.
Bewahren Sie beide Hefte für späteren Gebrauch oder für Nachbesitzer auf.
Bei Nichtbeachtung der Betriebsanleitung und der Sicherheitshinweise können Schäden am Gerät und Gefahren für den Bediener und andere Personen entstehen.
Bei Transportschaden sofort Händler informieren.
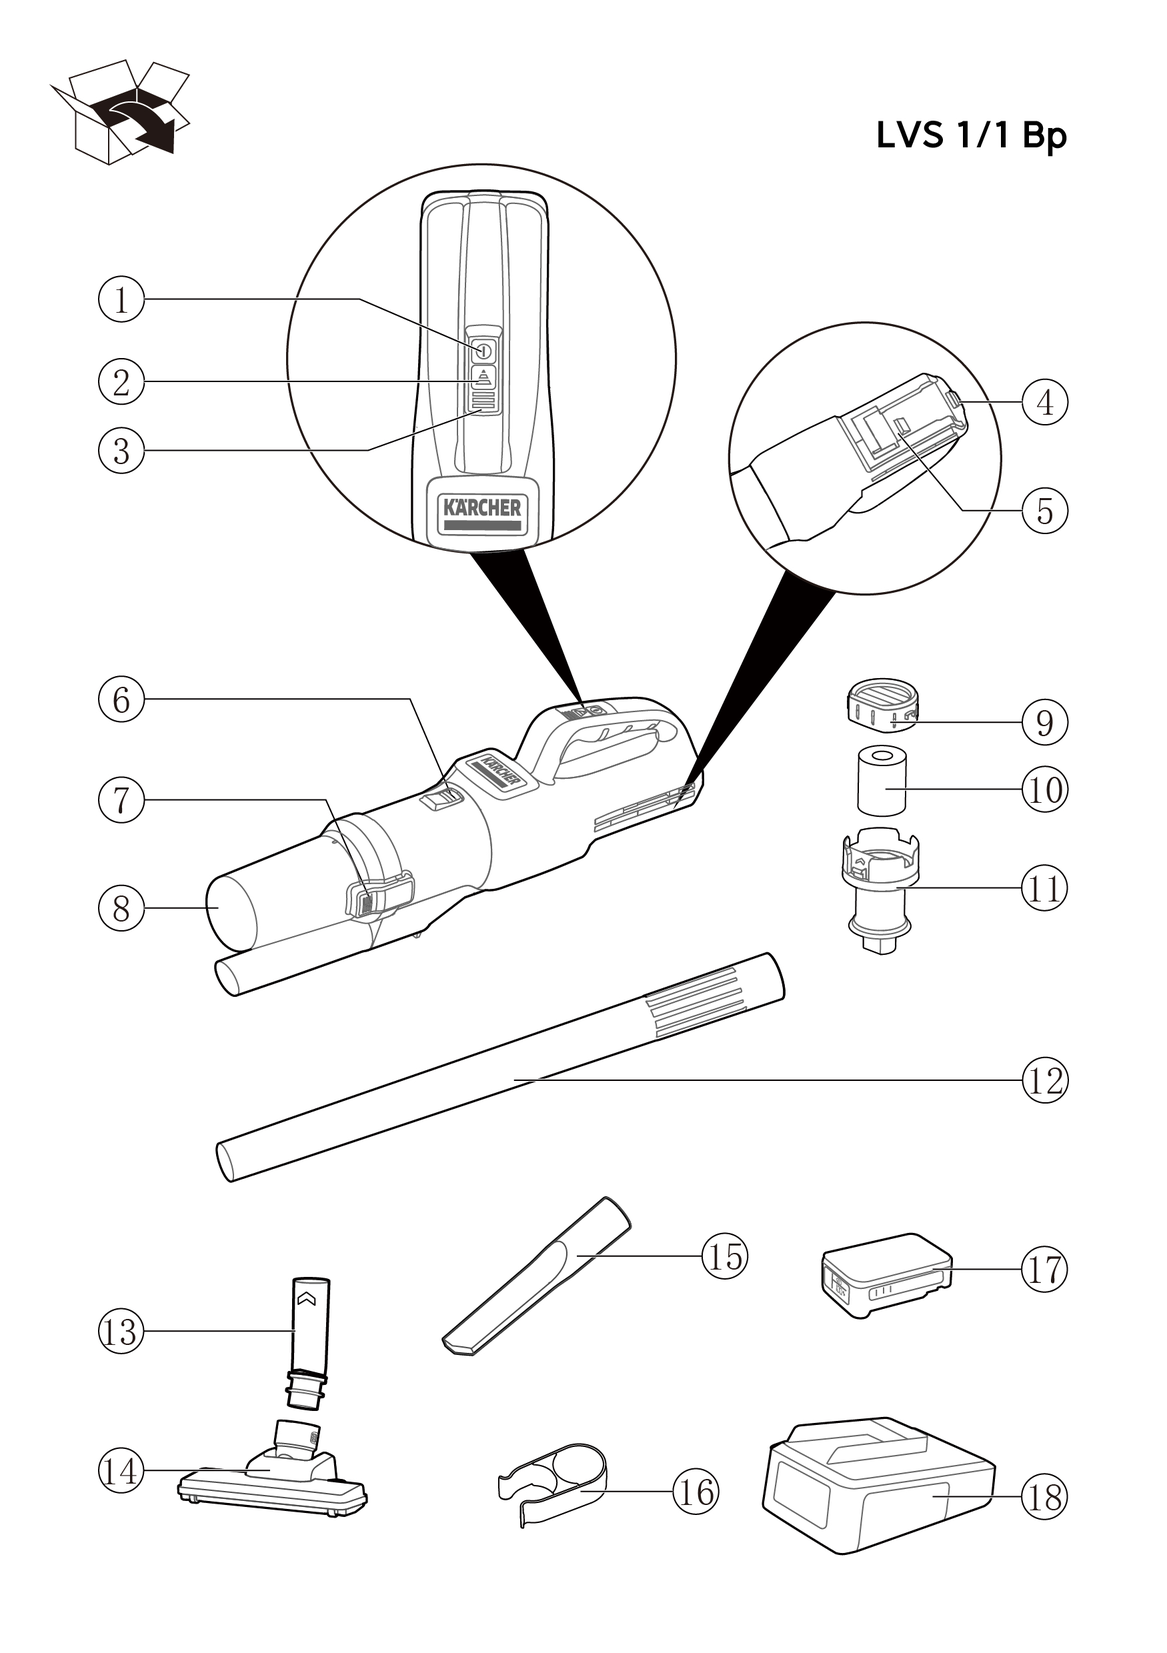
Prüfen Sie beim Auspacken den Packungsinhalt auf fehlendes Zubehör oder Beschädigungen.
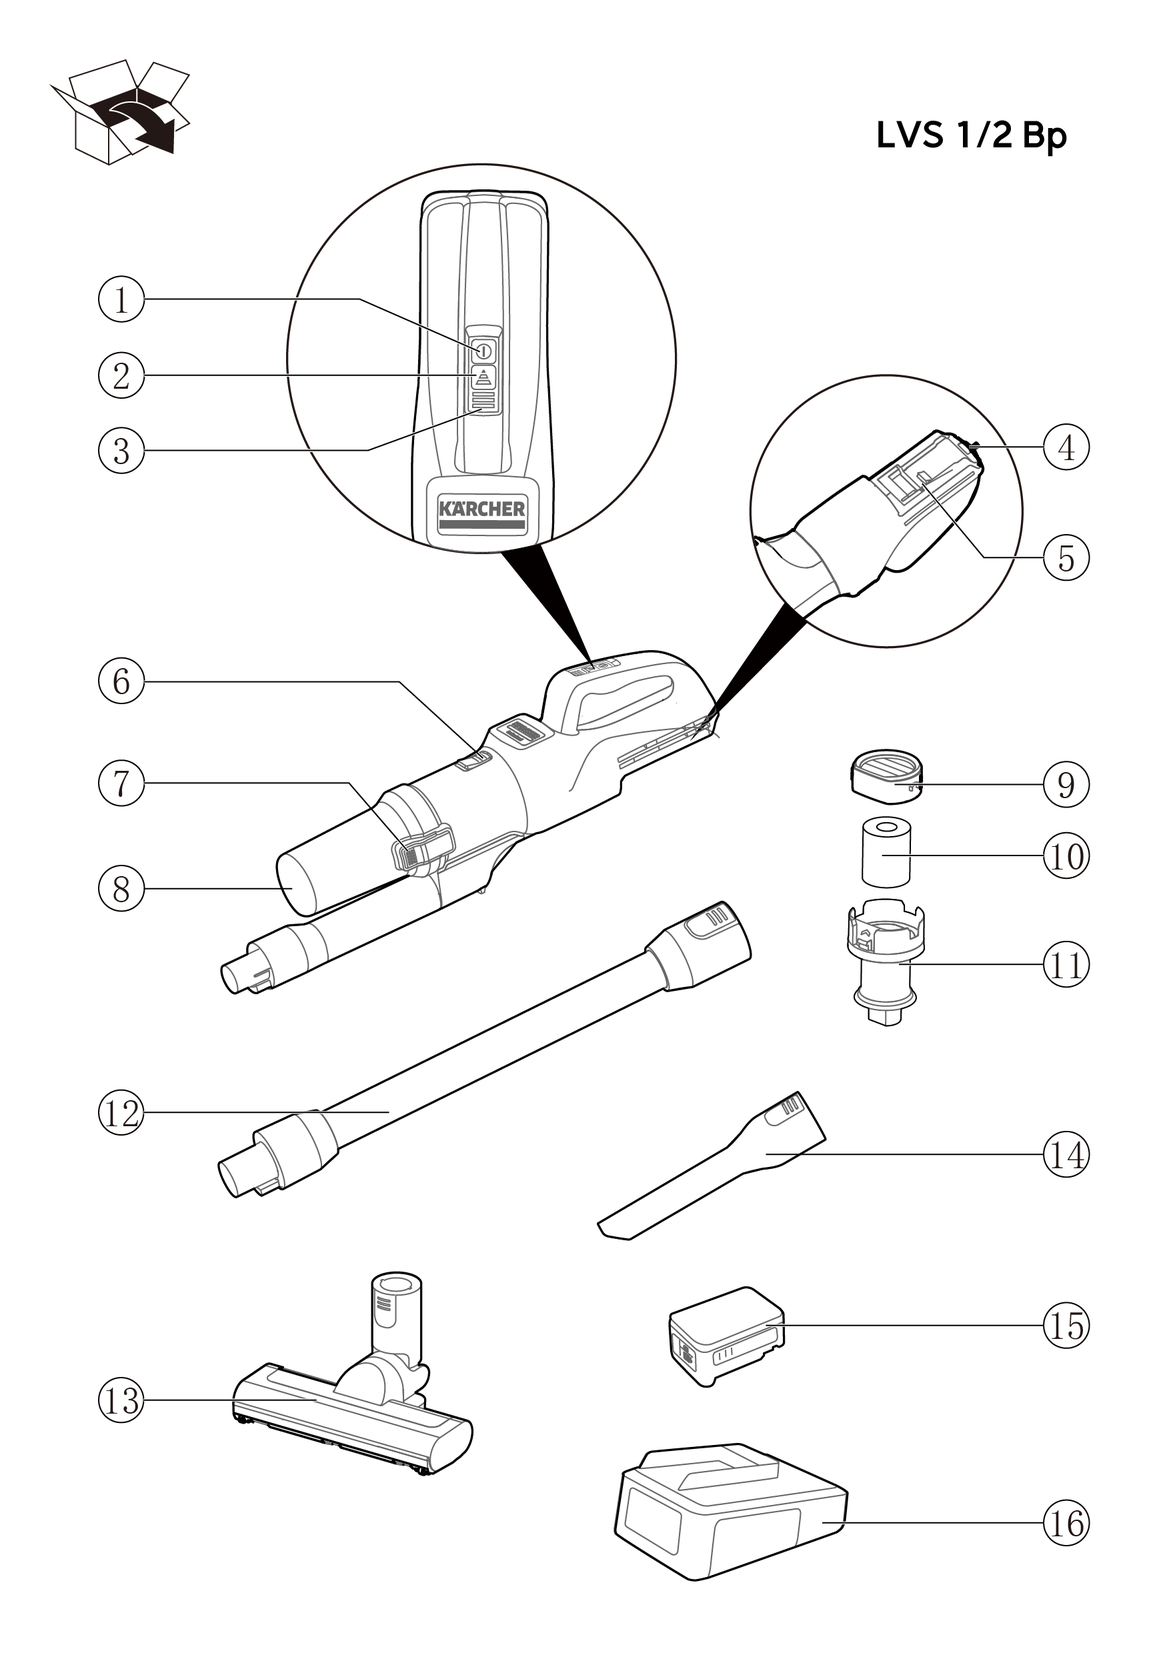
Der Lieferumfang Ihrer Ausstattungsvariante ist auf der Verpackung abgebildet.
 Die Verpackungsmaterialien sind recyclebar. Bitte Verpackungen umweltgerecht entsorgen.
 Elektrische und elektronische Geräte enthalten wertvolle recyclebare Materialien und oft Bestandteile wie Batterien, Akkus oder Öl, die bei falschem Umgang oder falscher Entsorgung eine potenzielle Gefahr für die menschliche Gesundheit und die Umwelt darstellen können. Für den ordnungsgemäßen Betrieb des Geräts sind diese Bestandteile jedoch notwendig. Mit diesem Symbol gekennzeichnete Geräte dürfen nicht mit dem Hausmüll entsorgt werden.
Aktuelle Informationen zu Inhaltsstoffen finden Sie unter: www.kaercher.de/REACH
Gesundheitsgefahr
Einatmen von gesundheitsschädlichen Stäuben
Das Gerät nicht für die Absaugung gesundheitsschädlicher Stäube verwenden.Beschädigung des Geräts
Kurzschluss durch hohe Luftfeuchtigkeit
Das Gerät nur in Innenräumen verwenden und lagern.Dieser Universalsauger ist zur Trockenreinigung von Boden- und Wandflächen bestimmt.
Dieses Gerät ist für den gewerblichen Gebrauch geeignet, z. B. in Hotels, Schulen, Krankenhäusern, Fabriken, Läden, Büros und Vermietergeschäften.
Lesen Sie zusätzlich die Betriebsanleitungen und Sicherheitshinweise, die den Akkupacks und dem Ladegerät beiliegen.
Dieses Gerät kann mit allen 18 V Kärcher Battery Power und Battery Power+ Akkupacks betrieben werden.
* optional accessory, depending on the configuration
* optional accessory, depending on the configuration
Bedienelemente für den Reinigungsprozess sind gelb.
Bedienelemente für die Wartung und den Service sind hellgrau.
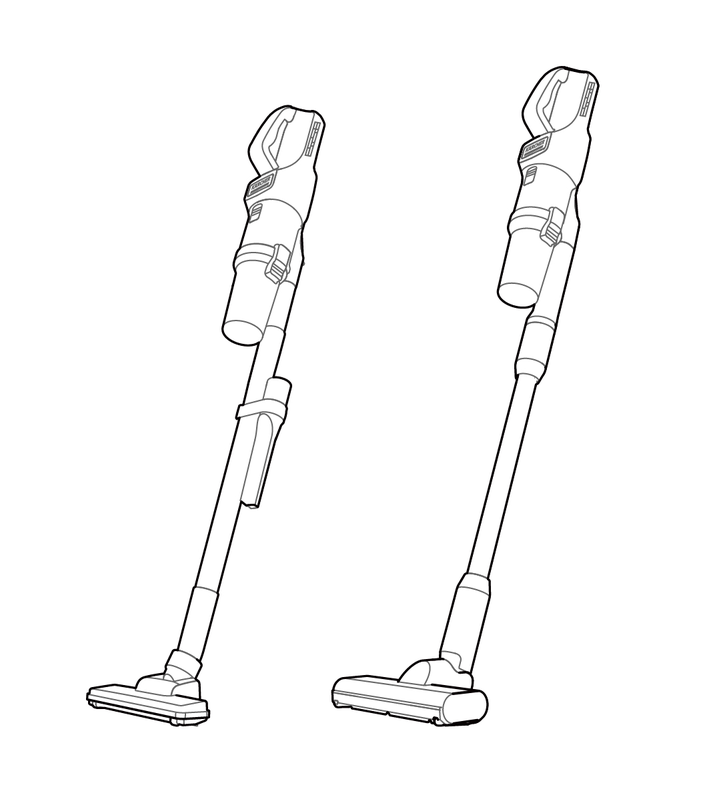
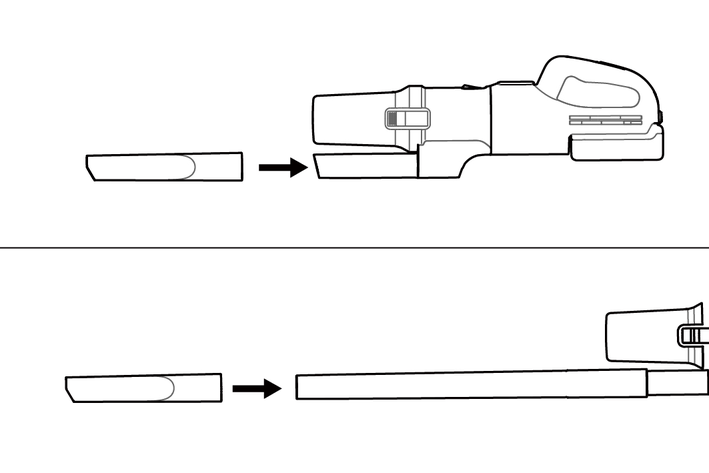
LVS 1/1 Bp
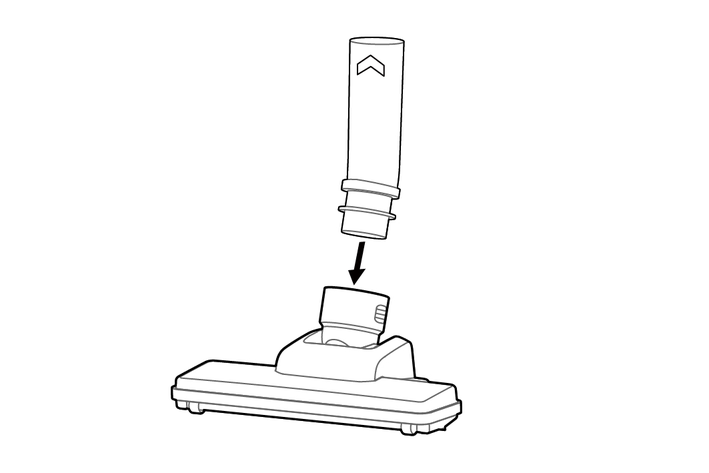
Install the floor nozzle tube and floor nozzle head together in the direction shown in the illustration.
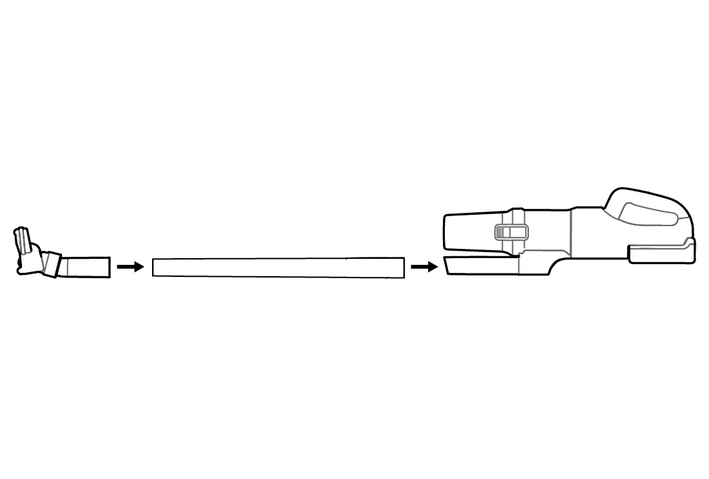
Push the floor nozzle onto the end of the suction tube until it is tight, and push another end of the suction tube onto the main body.
Remove the floor nozzle or the suction tube in the opposite direction of installation.
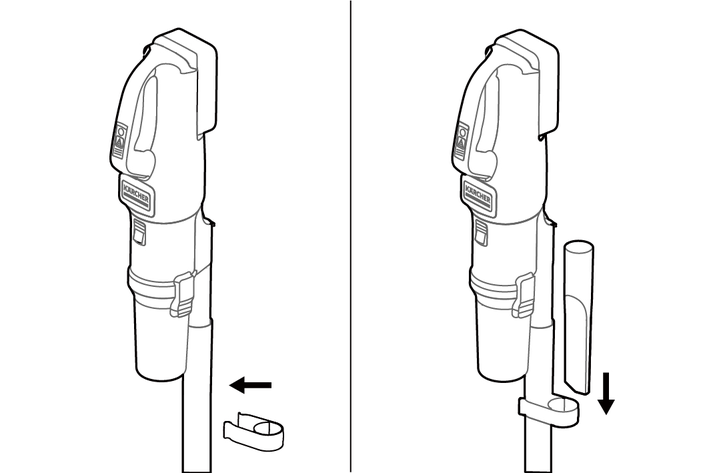
Install the crevice nozzle holder on the suction tube in the direction shown in the illustration. the crevice nozzle can be stored in the holder.
Push the accessory, such as the crevice nozzle, onto the suction fitting of the dust container or suction pipe until it is tight.
Floor nozzle: ideal for hard floors and carpet.
Crevice nozzle: For edges, joint, heaters and areas that are difficult to reach.
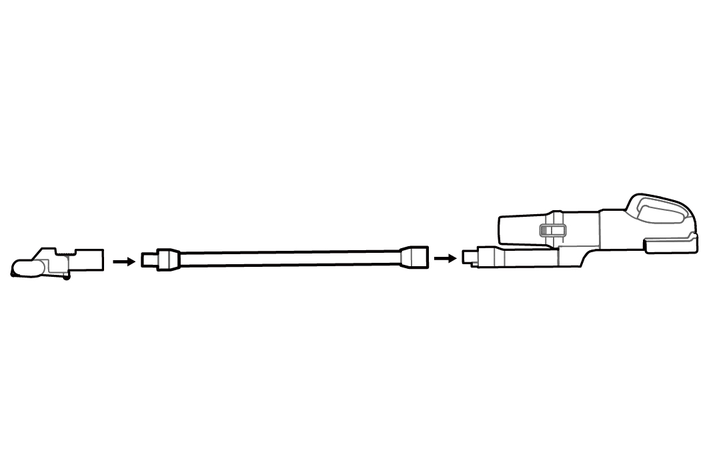
LVS 1/2 Bp
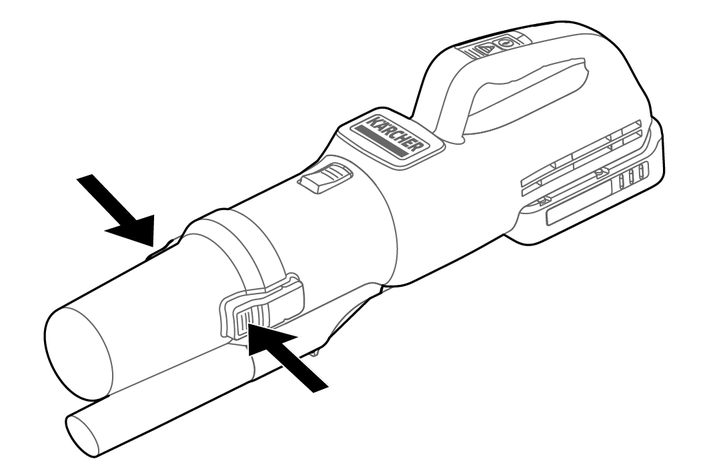
Push the suction pipe onto the suction fitting of the main body until it audibly clicks into place. Push the floor nozzle onto the suction pipe until it audibly clicks into place.
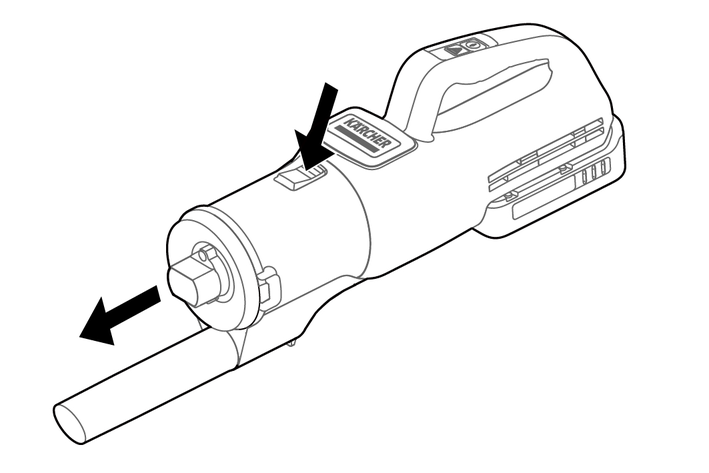
Press the unlocking button and remove the suction pipe from the suction fitting. Press the unlocking button and remove the floor nozzle from the suction tube.
Push the crevice nozzle onto the suction fitting of the dust container or suction pipe until it audibly clicks into place.
Akkupack in Akkuhalter einschieben und einrasten.
Betriebsanleitung des Ladegerätherstellers lesen und insbesondere die Sicherheitshinweise beachten!
Betriebsanleitung des Akkupackherstellers lesen und insbesondere die Sicherheitshinweise beachten!
Der Akkupack ist bei Auslieferung teilgeladen. Vor Inbetriebnahme und bei Bedarf aufladen.
Das Laden des Akkupacks kann nur in entnommenem Zustand erfolgen.
Entriegelungstaste drücken und Akkupack entnehmen.
Akkupack gemäß den Betriebsanleitungen des Ladegerätherstellers und des Akkupackherstellers aufladen.
The LED on the device shows information on the power level and error messages.
Indicators | LED status | Mode |
|---|---|---|
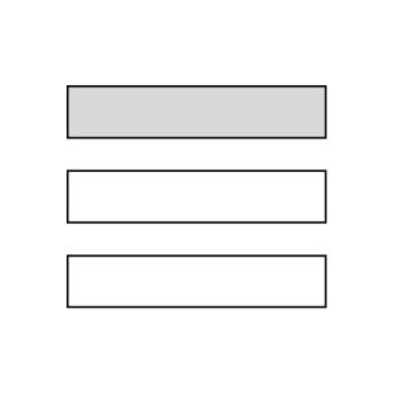 | 1st LED light up blue | ECO Mode*Minimum suction power |
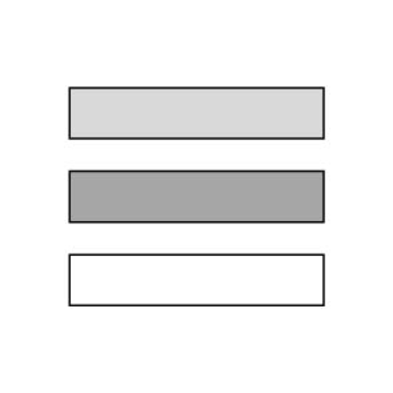 | 1st LED light up blue 2nd LED light up green | Normal Mode: Standard suction power |
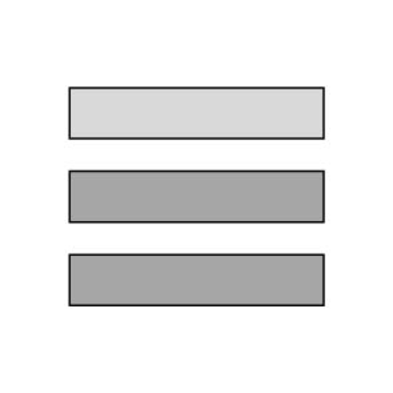 | 1st LED light up blue 2nd and 3rd LED light up green | Power Mode: Maximum suction power |
*Eco mode: The device works with reduced suction performance. The battery run time is extended.
Indicators | LED status | Information |
|---|---|---|
 | 1st LED flashes orange | Blockage / filtration missing |
Press the on/ off button , the device starts up.
Press the on / off button again, the device stops.
3-mode options for power and run time management. You can change the suction power in three steps by pressing the mode button. Each press on this button repeats the Eco / Normal / Power mode in a cycle.
The selected mode before the last shutdown remains stored, which is reactivated when the device is switched on again.
To ensure an optimum suction performance,empty the dust container before
it exceeds the dust "Max" line.
Switch off the device.Press the On/Off switch again to turn the device off,
Pointing the floor nozzle downwards, pull the dust container apart from the main body by holding the dust container firmly and pressing the release buttons on the both sides.
Empty the dust container.
Reinsert the dust container.
Nichtbeachtung des Gewichts
Verletzungs- und Beschädigungsgefahr
Beachten Sie beim Transport das Gewicht des Geräts.Gerät beim Transport in Fahrzeugen nach den jeweils geltenden Richtlinien gegen Rutschen und Kippen sichern.
Failure to observe the weight
Risk of injury and damage
Be aware of the weight of the device during storage.The device may only be stored indoors.
Press the unlocking button and remove the battery pack to prevent discharge.
Store the device in a dry room and secure it against unauthorised use.
Verletzungsgefahr!
Verletzungen durch Berühren von sich bewegenden Teilen.
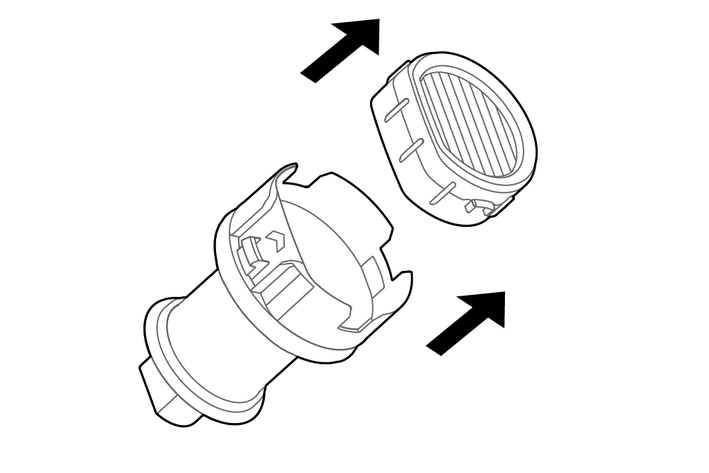
Schalten Sie das Gerät aus.Entnehmen Sie den Akkupack.Cleaning the cyclone
Press the filtration release button by one hand, and pull the filtration system out by another hand. Clean the adhered dust off the mesh metal filter.

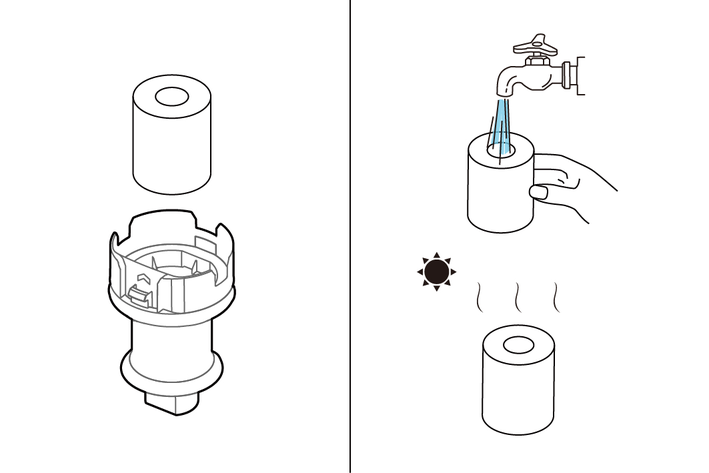
Cleaning / Replacing the filter
Pull out the filtration system.
Take the HEPA out.
Clean the filter element with gently knocking or replace if necessary.
Take the sponge filter out.
Rinse the sponge filter by running water and dry it completely, or replace the sponge filter.
Install the sponge filter and HEPA in to the filtration system.
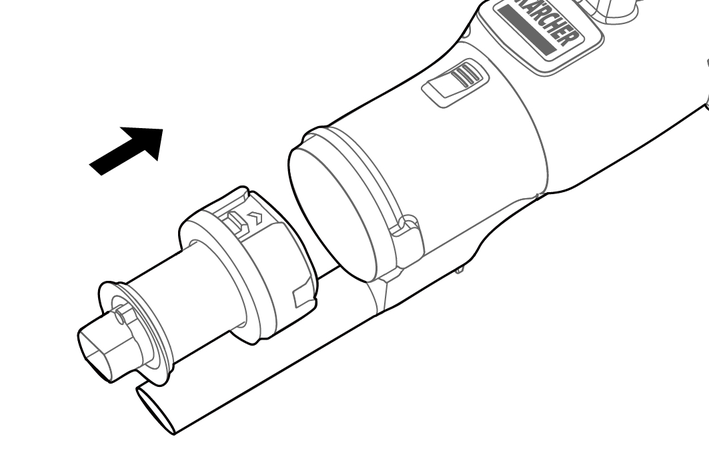
With the arrow facing upward, following the direction of the arrow, push the filtration system into the main body until it audibly clicks into place.
Risk of damage!
Damage to the filter elements during mechanical cleaning.
Carefully clean the filters by gently knocking the dirt out. Do not expose the filter area to any mechanical loads and replace the filters if damaged.Do not operate the device without the complete filter elements.
Gefahr eines Stromschlags
Verletzungen durch Berühren von stromführenden Teilen
Schalten Sie das Gerät aus.Entnehmen Sie den Akkupack.Battery is empty
Charge the rechargeable battery.
Battery is not inserted correctly
Push the battery into the mount until it locks into place.
Battery is defective
Replace the battery.
Error detected
The LED strip flashes orange, the device does not start up.
Filtration system is not install properly.
Check whether HEPA and filtration is in right position.
Install the HEPA into the filtration system.
With the arrow facing upward, following the direction of the arrow, push the filtration system into the main body until it audibly clicks into place.
Blockage
Floor nozzle blockage
LVS 1/1: Disassemble the floor nozzle, and clean the blockage.
LVS 1/2: Disassemble the roller by sliding the unlock button. Clean the roller and remove any blockage in the floor nozzle with suitable aid.
Suction tube blockage.
Disassemble the suction tube and remove the blockage.
The dust container is full.
Empty the dust container.
The filters are soiled.
Clean the cyclone, HEPA and sponge filter, referring to the section of Cleaning the filtration system.
Unsatisfactory vacuuming result
Remove blockages from the brush head, and suction tube.
Clean the cyclone or replace motor protection filter or HEPA filter.
Kann die Störung nicht behoben werden, muss das Gerät vom Kundendienst überprüft werden.
In jedem Land gelten die von unserer zuständigen Vertriebsgesellschaft herausgegebenen Garantiebedingungen. Etwaige Störungen an Ihrem Gerät beseitigen wir innerhalb der Garantiefrist kostenlos, sofern ein Material- oder Herstellungsfehler die Ursache sein sollte. Im Garantiefall wenden Sie sich bitte mit Kaufbeleg an Ihren Händler oder die nächste autorisierte Kundendienststelle.
Nähere Informationen finden Sie unter: www.kaercher.com/dealersearch
Weitere Garantieinformationen (falls vorhanden) finden Sie im Service-Bereich Ihrer lokalen Kärcher-Webseite unter "Downloads".
Nur Original-Zubehör und Original-Ersatzteile verwenden, sie bieten die Gewähr für einen sicheren und störungsfreien Betrieb des Geräts.
Informationen über Zubehör und Ersatzteile finden Sie unter www.kaercher.com.
Electrical connection | |
Battery pack nominal voltage | 18 DC V |
Rated power | 230 W |
Protection class | III  |
Device performance data | |
Operating time at full battery charge (without floor nozzle) | ≤35 (18V 3.0Ah) min |
Tank content | 0.35 l |
Air quantity (max.) | ≤14 l/s |
Vacuum (max.) | ≤14 kPa |
Dimensions and weights | |
Weight without accessories and battery pack | 1.6 kg |
Length | 179 mm |
Width | 220 mm |
Height | 1100 mm |
Ambient conditions | |
Ambient temperature | 0/+40 °C |
Electrical connection | |
Battery pack nominal voltage | 36 DC V |
Rated power | 350 W |
Protection class | III |
Device performance data | |
Operating time at full battery charge (without floor nozzle) | ≤43 (36V 2.5Ah) min |
Tank content | 0.35
l |
Air quantity (max.) | ≤15 l/s |
Vacuum (max.) | ≤22 kPa |
Dimensions and weights | |
Weight without accessories and battery pack | 2.0 kg |
Length | 186 mm |
Width | 250 mm |
Height | 1150 mm |
Ambient conditions | |
Ambient temperature | 0/+40 °C |
Hiermit erklären wir, dass die nachfolgend bezeichnete Maschine aufgrund ihrer Konzipierung und Bauart sowie in der von uns in Verkehr gebrachten Ausführung den einschlägigen grundlegenden Sicherheits- und Gesundheitsanforderungen der EU-Richtlinien entspricht. Bei einer nicht mit uns abgestimmten Änderung der Maschine verliert diese Erklärung ihre Gültigkeit.
Produkt: Trockensauger Bp
Typ: 1.367-xxx
Einschlägige EU-Richtlinien2006/42/EG (+2009/127/EG)
2011/65/EU
2014/30/EU
Angewandte harmonisierte NormenEN 60335-1
EN 60335-2-69
EN IEC 63000: 2018
EN 55014-1: 2017 + A11: 2020
EN 55014-2: 2015
EN 62233: 2008
Angewandte nationale Normen-
Die Unterzeichnenden handeln im Auftrag und mit Vollmacht des Vorstands.

Dokumentationsbevollmächtigter:
S. Reiser
Alfred Kärcher SE & Co. KG
Alfred-Kärcher-Str. 28 - 40
71364 Winnenden (Germany)
Tel.: +49 7195 14-0
Fax: +49 7195 14-2212
Winnenden, /06/01