LVS 1/1 BpLVS 1/2 Bp
(09/24)
(09/24)
 Read these original instructions and the enclosed safety instructions before using the device for the first time. Act in accordance with them.
Keep both books for future reference or for future owners.
If the operating instructions and safety instructions are not observed, the device can be damaged and dangers could arise for users and other persons.
Notify the dealer immediately in the case of shipping damage.
Check the package contents when unpacking for missing accessories or for damage.
The scope of delivery for your equipment version is shown on the packaging.
 The packing materials can be recycled. Please dispose of packaging in accordance with the environmental regulations.
 Electrical and electronic devices contain valuable, recyclable materials and often components such as batteries, rechargeable batteries or oil, which - if handled or disposed of incorrectly - can pose a potential danger to human health and the environment. However, these components are required for the correct operation of the device. Devices marked by this symbol are not allowed to be disposed of together with the household rubbish.
Current information on content materials can be found at: www.kaercher.de/REACH
Health risk
Inhalation of dusts that are harmful to health
Do not use the device for vacuuming up dusts that are harmful to health.Damage to the device
Short-circuit due to high levels of humidity
Only use and store the device indoors.This universal vacuum cleaner for carpets is intended for dry cleaning floor and wall surfaces.
This device is suitable for commercial use, e.g. in hotels, schools, hospitals, factories, shops, offices, and rental companies.
In addition, read the operating instructions and safety instructions that come with the battery pack and the charger.
This device can be operated with all 18 V Kärcher Battery Power and Battery Power+ battery packs.
* optional accessory, depending on the configuration
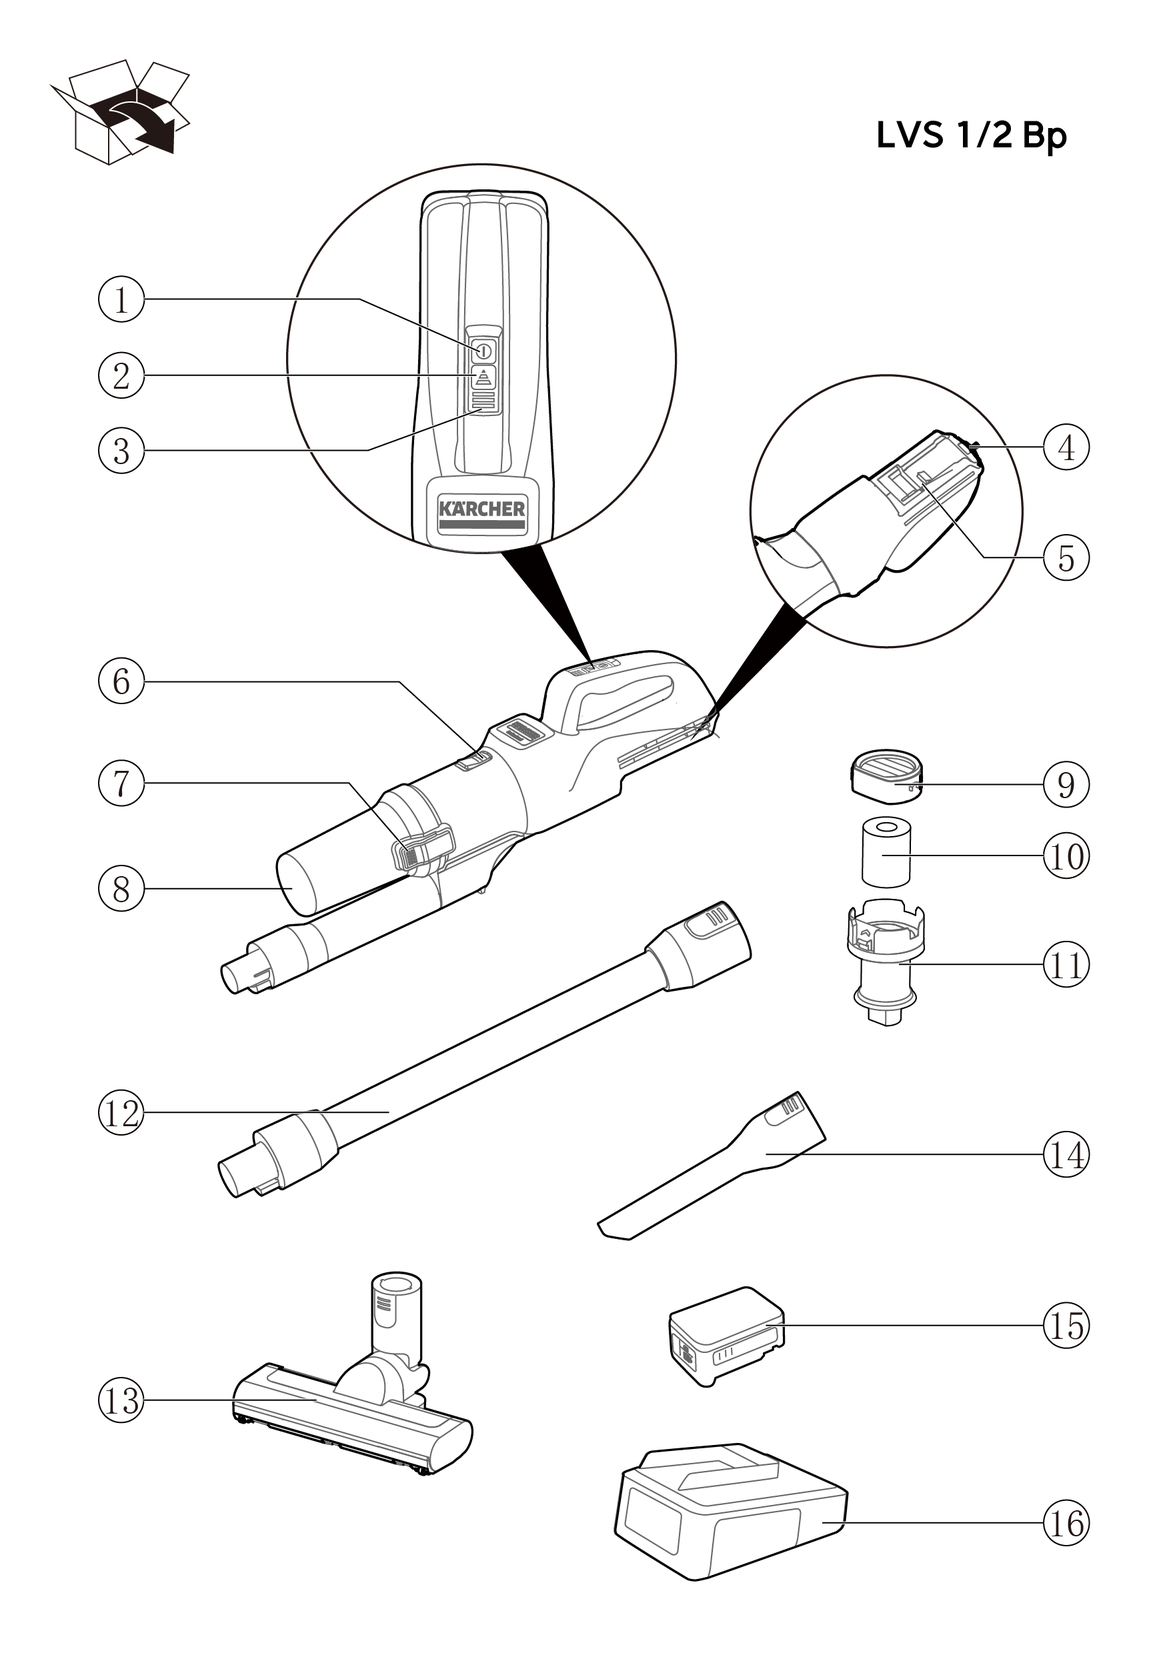
* optional accessory, depending on the configuration
Control elements for the cleaning process are yellow.
Control elements for maintenance and servicing are light grey.
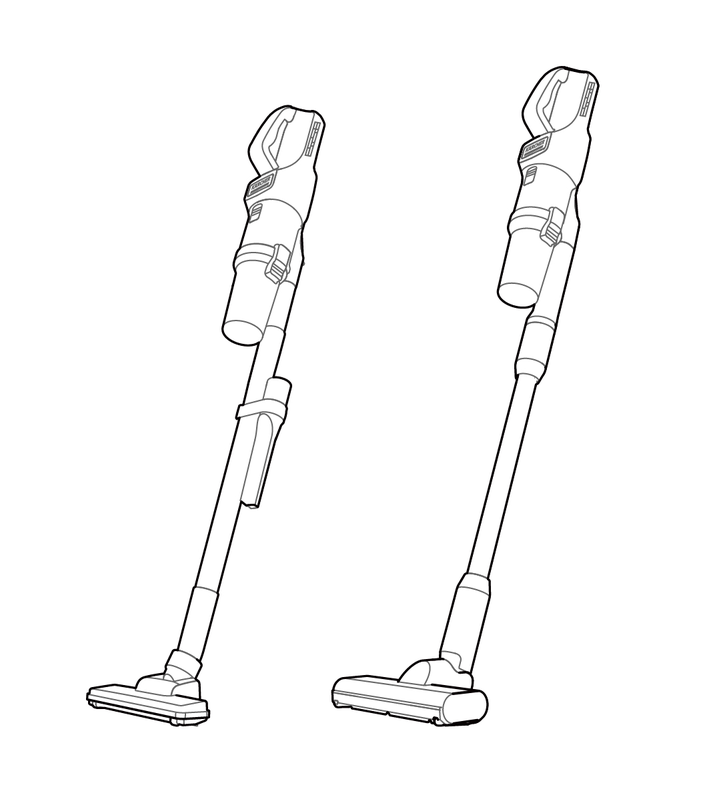
LVS 1/1 Bp
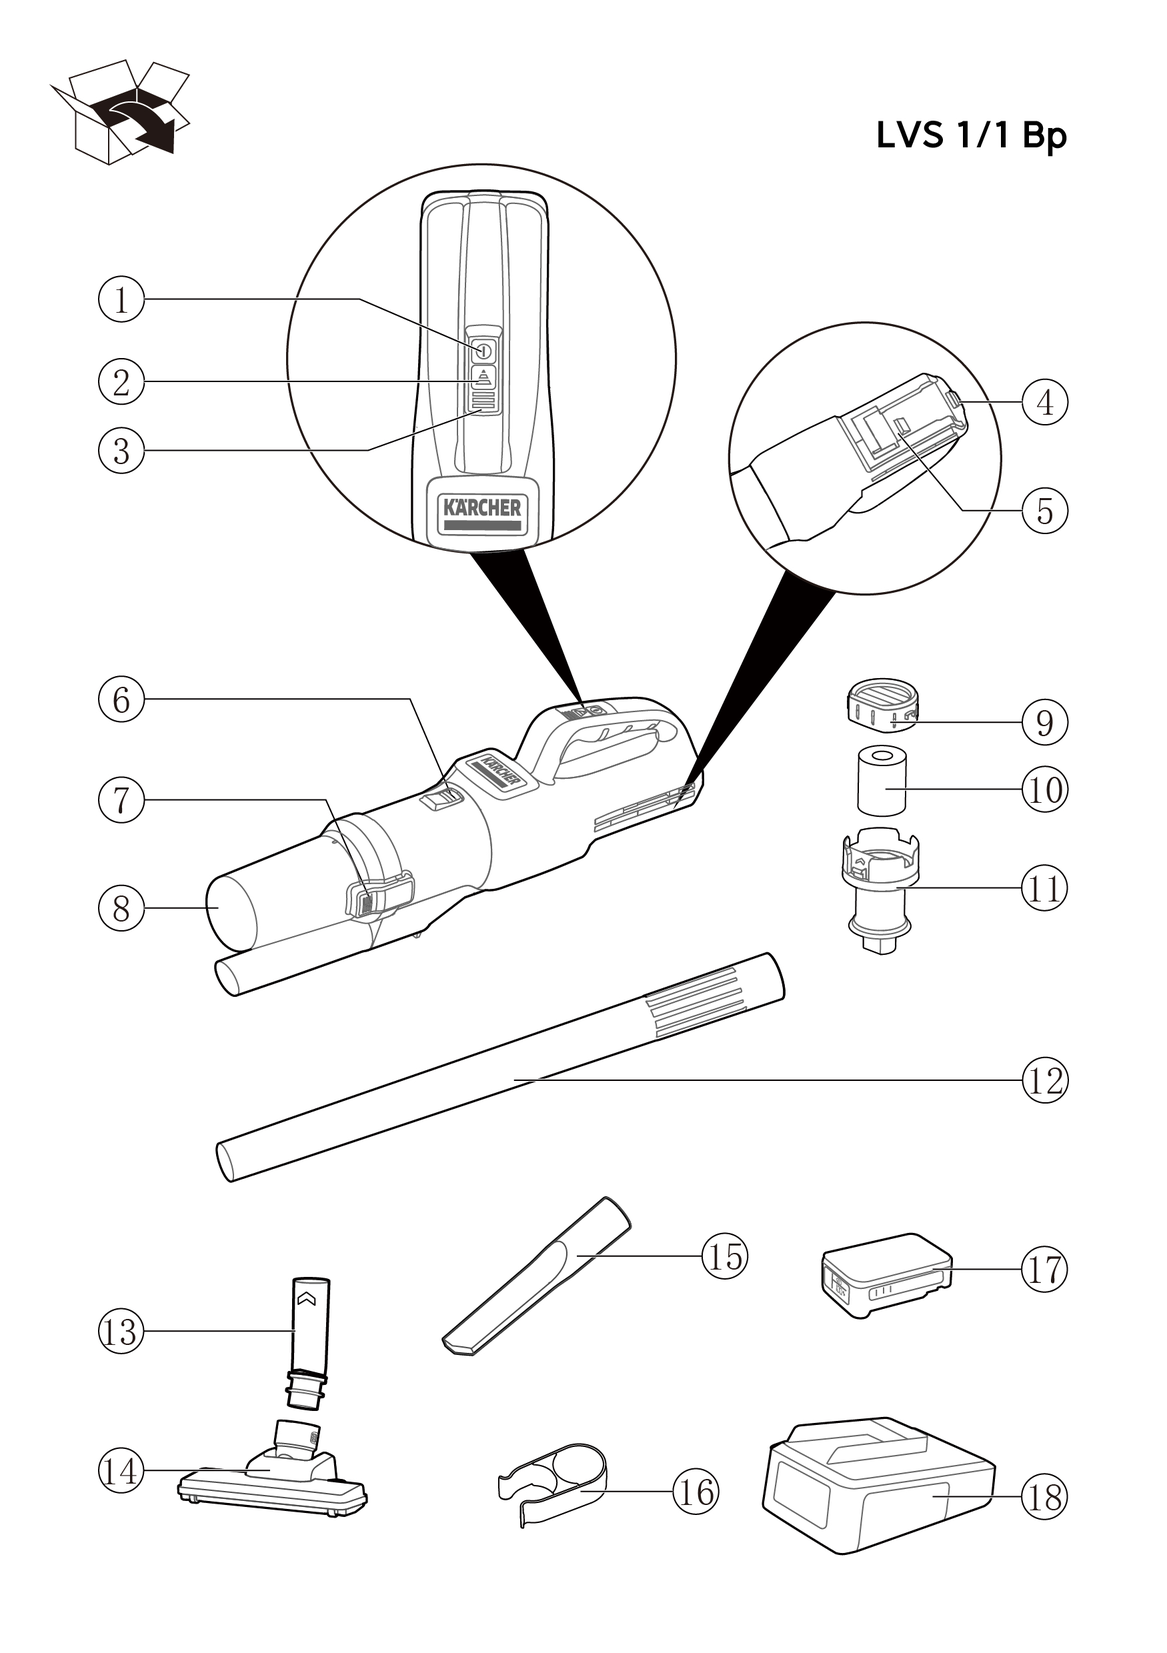
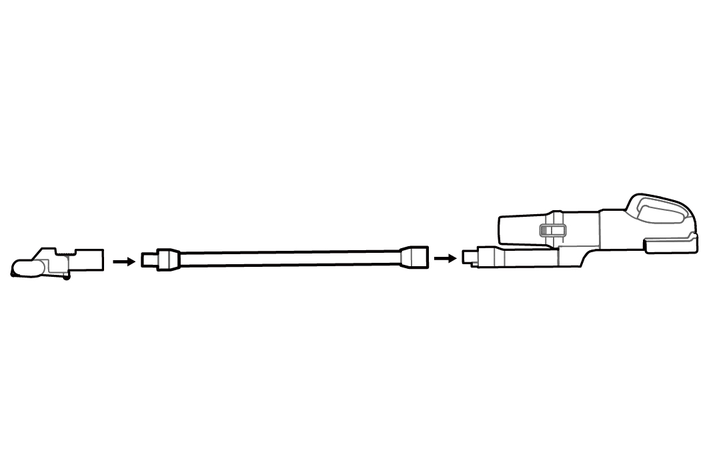
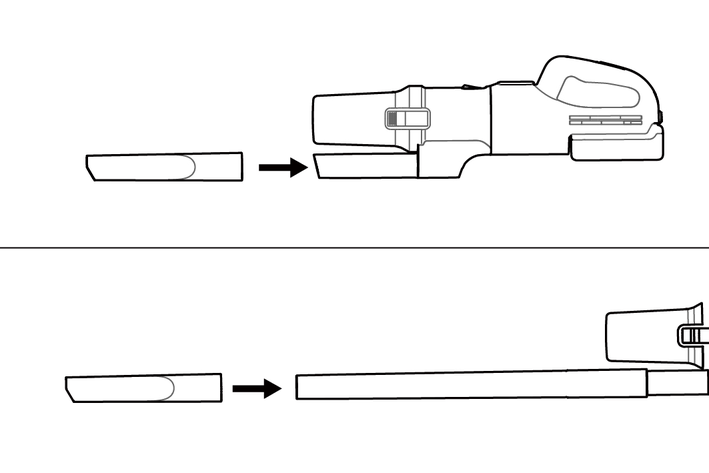
Install the floor nozzle tube and floor nozzle head together in the direction shown in the illustration.
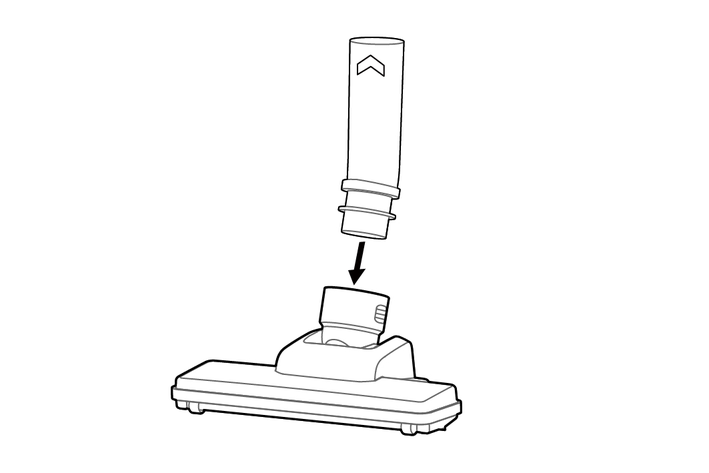
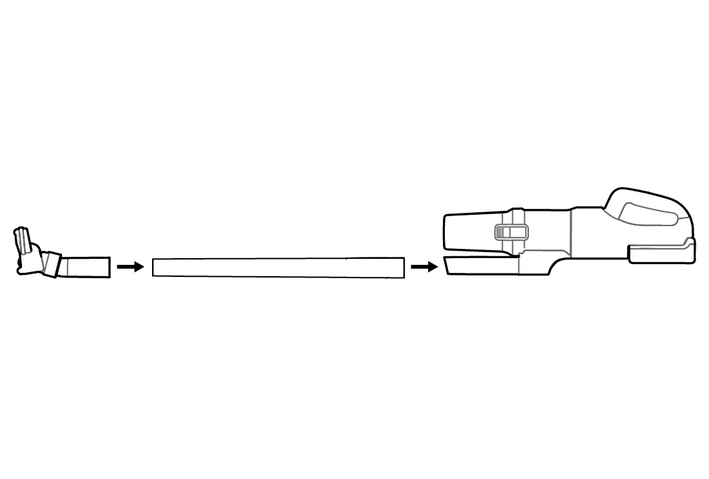
Push the floor nozzle onto the end of the suction tube until it is tight, and push another end of the suction tube onto the main body.
Remove the floor nozzle or the suction tube in the opposite direction of installation.
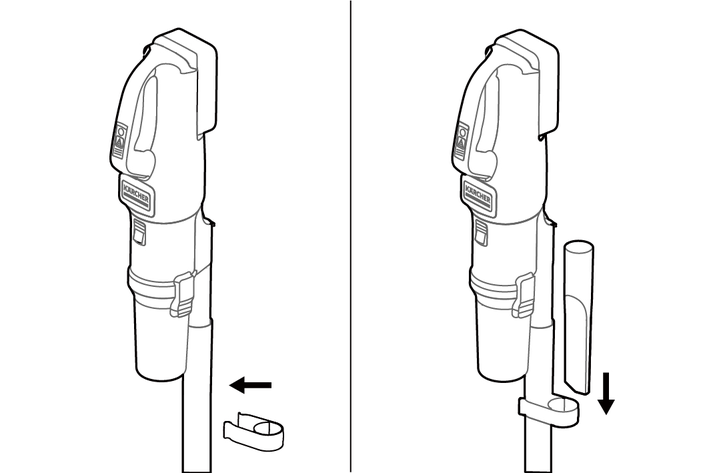
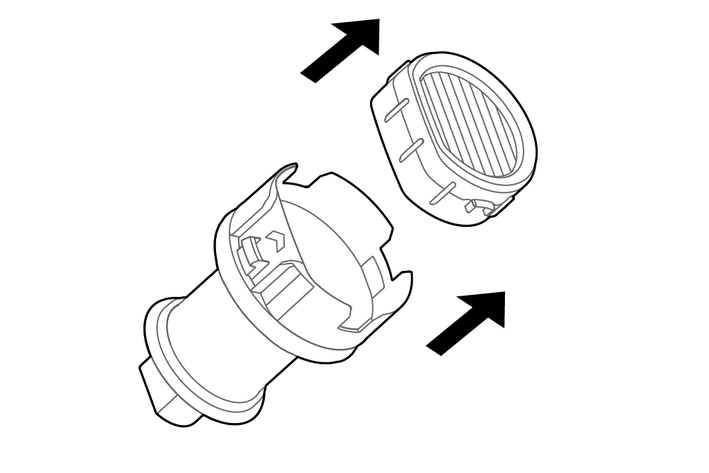
Install the crevice nozzle holder on the suction tube in the direction shown in the illustration. the crevice nozzle can be stored in the holder.
Push the accessory, such as the crevice nozzle, onto the suction fitting of the dust container or suction pipe until it is tight.
Floor nozzle: ideal for hard floors and carpet.
Crevice nozzle: For edges, joint, heaters and areas that are difficult to reach.
LVS 1/2 Bp
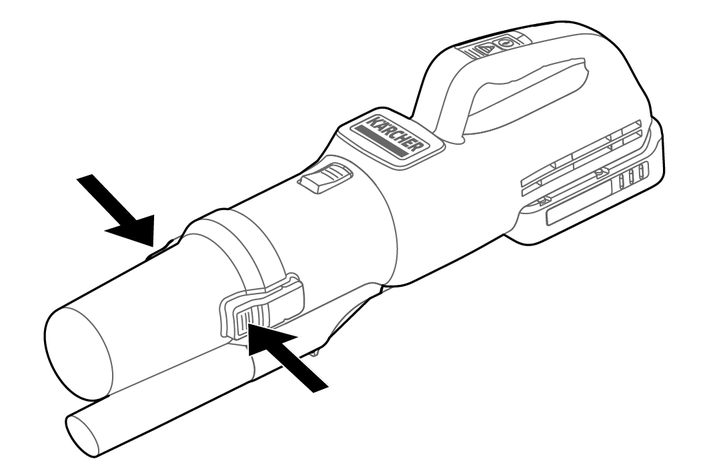
Push the suction pipe onto the suction fitting of the main body until it audibly clicks into place. Push the floor nozzle onto the suction pipe until it audibly clicks into place.
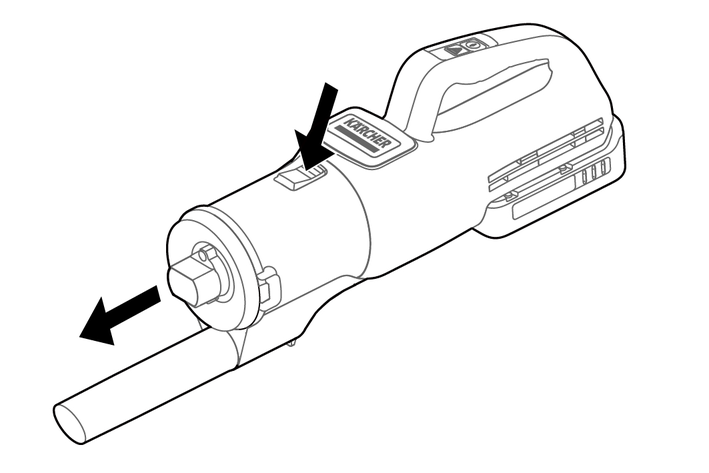
Press the unlocking button and remove the suction pipe from the suction fitting. Press the unlocking button and remove the floor nozzle from the suction tube.
Push the crevice nozzle onto the suction fitting of the dust container or suction pipe until it audibly clicks into place.
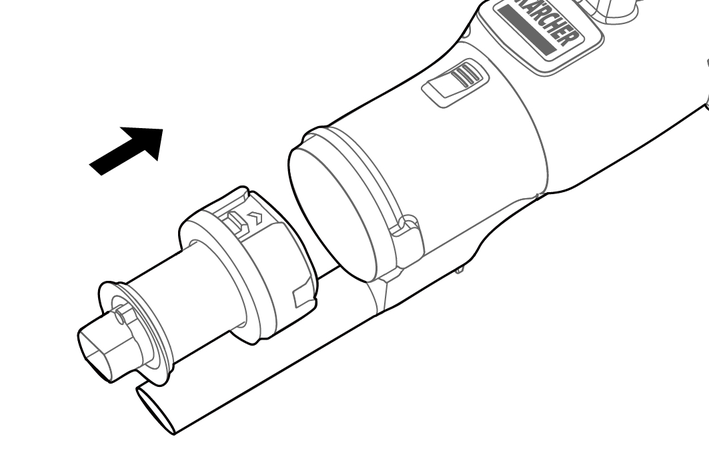
Slide the battery pack into the battery holder and lock it in place.
Please read the operating instructions of the charger manufacturer, especially the chapters on safety instructions!
Please read the operating instructions of the battery pack manufacturer, especially the chapters on safety instructions!
The battery pack is partially charged on delivery. Charge before use and when necessary.
The battery pack can only be charged when it is removed.
Press the unlocking button and remove the battery pack.
Charge the battery pack according to the operating instructions of the charger manufacturer and the battery pack manufacturer.
The LED on the device shows information on the power level and error messages.
Indicators | LED status | Mode |
|---|---|---|
 | 1st LED light up blue | ECO Mode*Minimum suction power |
 | 1st LED light up blue 2nd LED light up green | Normal Mode: Standard suction power |
 | 1st LED light up blue 2nd and 3rd LED light up green | Power Mode: Maximum suction power |
*Eco mode: The device works with reduced suction performance. The battery run time is extended.
Indicators | LED status | Information |
|---|---|---|
 | 1st LED flashes orange | Blockage / filtration missing |
Press the on/ off button , the device starts up.
Press the on / off button again, the device stops.
3-mode options for power and run time management. You can change the suction power in three steps by pressing the mode button. Each press on this button repeats the Eco / Normal / Power mode in a cycle.
The selected mode before the last shutdown remains stored, which is reactivated when the device is switched on again.
To ensure an optimum suction performance,empty the dust container before
it exceeds the dust "Max" line.
Switch off the device.Press the On/Off switch again to turn the device off,
Pointing the floor nozzle downwards, pull the dust container apart from the main body by holding the dust container firmly and pressing the release buttons on the both sides.
Empty the dust container.
Reinsert the dust container.
Failure to observe the weight
Risk of injury and damage
Be aware of the weight of the device during transportation.When transporting the device in vehicles, secure it to prevent it from slipping or overturning in accordance with the respective valid guidelines.
Failure to observe the weight
Risk of injury and damage
Be aware of the weight of the device during storage.The device may only be stored indoors.
Press the unlocking button and remove the battery pack to prevent discharge.
Store the device in a dry room and secure it against unauthorised use.
Risk of injury!
Injuries due to touching moving parts.
Switch off the device.Remove the battery pack.Cleaning the cyclone
Press the filtration release button by one hand, and pull the filtration system out by another hand. Clean the adhered dust off the mesh metal filter.

Cleaning / Replacing the filter
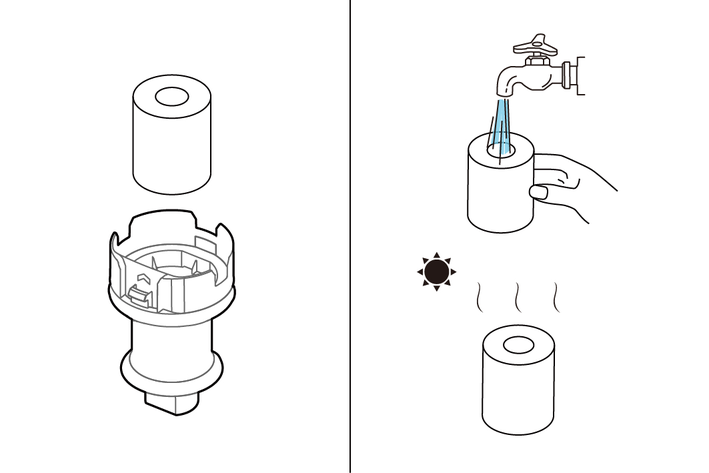
Pull out the filtration system.
Take the HEPA out.
Clean the filter element with gently knocking or replace if necessary.
Take the sponge filter out.
Rinse the sponge filter by running water and dry it completely, or replace the sponge filter.
Install the sponge filter and HEPA in to the filtration system.
With the arrow facing upward, following the direction of the arrow, push the filtration system into the main body until it audibly clicks into place.
Risk of damage!
Damage to the filter elements during mechanical cleaning.
Carefully clean the filters by gently knocking the dirt out. Do not expose the filter area to any mechanical loads and replace the filters if damaged.Do not operate the device without the complete filter elements.
Danger of electric shock
Injuries due to touching live parts
Switch off the device.Remove the battery pack.Battery is empty
Charge the rechargeable battery.
Battery is not inserted correctly
Push the battery into the mount until it locks into place.
Battery is defective
Replace the battery.
Error detected
The LED strip flashes orange, the device does not start up.
Filtration system is not install properly.
Check whether HEPA and filtration is in right position.
Install the HEPA into the filtration system.
With the arrow facing upward, following the direction of the arrow, push the filtration system into the main body until it audibly clicks into place.
Blockage
Floor nozzle blockage
LVS 1/1: Disassemble the floor nozzle, and clean the blockage.
LVS 1/2: Disassemble the roller by sliding the unlock button. Clean the roller and remove any blockage in the floor nozzle with suitable aid.
Suction tube blockage.
Disassemble the suction tube and remove the blockage.
The dust container is full.
Empty the dust container.
The filters are soiled.
Clean the cyclone, HEPA and sponge filter, referring to the section of Cleaning the filtration system.
Unsatisfactory vacuuming result
Remove blockages from the brush head, and suction tube.
Clean the cyclone or replace motor protection filter or HEPA filter.
If the malfunction cannot be corrected, the device must be checked by the Customer Service department.
The warranty conditions issued by our relevant sales company apply in all countries. We shall remedy possible malfunctions on your appliance within the warranty period free of cost, provided that a material or manufacturing flaw is the cause. In a warranty case, please contact your dealer (with the purchase receipt) or the next authorised customer service site.
Further information can be found at: www.kaercher.com/dealersearch
Further warranty information (if available) can be found in the service area of your local Kärcher website under "Downloads".
Only use original accessories and original spare parts. They ensure that the appliance will run fault-free and safely.
Information on accessories and spare parts can be found at www.kaercher.com.
Electrical connection | |
Battery pack nominal voltage | 18 DC V |
Rated power | 230 W |
Protection class | III  |
Device performance data | |
Operating time at full battery charge (without floor nozzle) | ≤35 (18V 3.0Ah) min |
Tank content | 0.35 l |
Air quantity (max.) | ≤14 l/s |
Vacuum (max.) | ≤14 kPa |
Dimensions and weights | |
Weight without accessories and battery pack | 1.6 kg |
Length | 179 mm |
Width | 220 mm |
Height | 1100 mm |
Ambient conditions | |
Ambient temperature | 0/+40 °C |
Electrical connection | |
Battery pack nominal voltage | 36 DC V |
Rated power | 350 W |
Protection class | III |
Device performance data | |
Operating time at full battery charge (without floor nozzle) | ≤43 (36V 2.5Ah) min |
Tank content | 0.35
l |
Air quantity (max.) | ≤15 l/s |
Vacuum (max.) | ≤22 kPa |
Dimensions and weights | |
Weight without accessories and battery pack | 2.0 kg |
Length | 186 mm |
Width | 250 mm |
Height | 1150 mm |
Ambient conditions | |
Ambient temperature | 0/+40 °C |
We hereby declare that the machine described below complies with the relevant basic safety and health requirements in the EU Directives, both in its basic design and construction as well as in the version placed in circulation by us. This declaration is invalidated by any changes made to the machine that are not approved by us.
Product: Dry vacuum cleaner Bp
Type: 1.367-xxx
Currently applicable EU Directives2006/42/EC (+2009/127/EC)
2011/65/EU
2014/30/EU
Harmonised standards usedEN 60335-1
EN 60335-2-69
EN IEC 63000: 2018
EN 55014-1: 2017 + A11: 2020
EN 55014-2: 2015
EN 62233: 2008
National standards used-
The signatories act on behalf of and with the authority of the company management.

Documentation supervisor:
S. Reiser
Alfred Kärcher SE & Co. KG
Alfred-Kärcher-Str. 28 - 40
71364 Winnenden (Germany)
Ph.: +49 7195 14-0
Fax: +49 7195 14-2212
Winnenden, /06/01