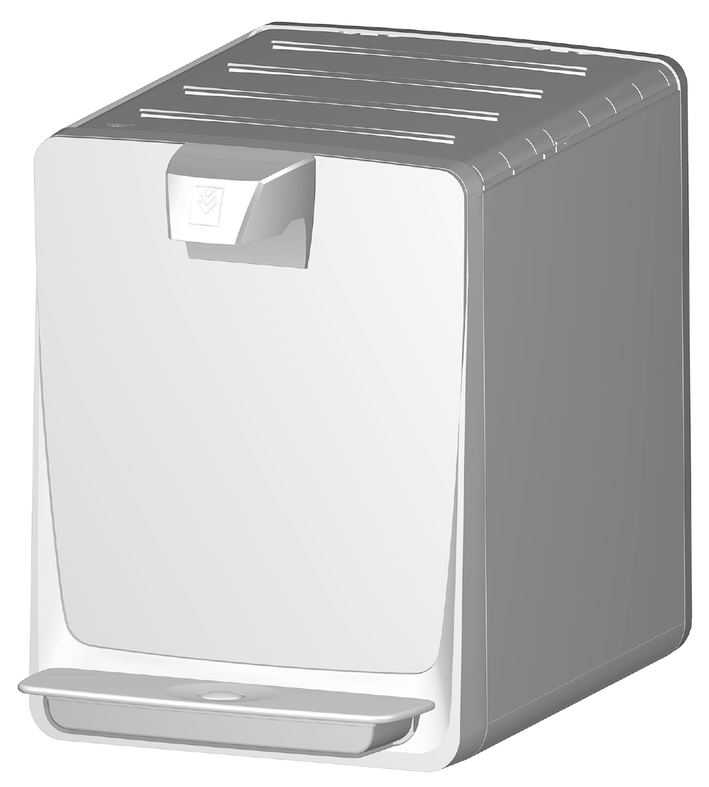
WPD 55
59803450 (03/25)
59803450 (03/25)
 Read the original instructions before using the unit for the first time and act in accordance with it. Keep the original instructions for future reference or for future owners.
Only drinking water from a public water supply may be used to guarantee the water quality of the water. The quality must at least correspond to the guidelines of the World Health Organization (WHO).
If intervention in the drinking water network is necessary in order to install the unit, this must be done by a trained specialist who is authorised to do this according to the laws and regulations valid for the location. The work must be commissioned by the customer if required.
For protection against water damage caused by a burst water hose, we recommend installing a shut-off device and an aqua stop (optionally available) in the water supply line.
Maintenance work in the interior of the unit may only be carried out by the operator of the unit who has read these operating instructions.
Do not clean the unit with a water jet.
Plastic surfaces must not be cleaned with alcohol-based, aggressive or abrasive detergents. The surface cleaner CA 30 R (6.295-686.0) is recommended.
Indication of an imminent threat of danger that will lead to severe injuries or even death.
Indication of a potentially dangerous situation that may lead to severe injuries or even death.
Indication of a potentially dangerous situation that may lead to minor injuries.
Indication of a potentially dangerous situation that may lead to damage to property.
Risk of electric shock. Always pull out the mains plug before working on the device. The socket must be protected with a 30 mA fault current protection switch.
Do not store explosive substances such as aerosol cans with a flammable propellant in this appliance.
When positioning the appliance, ensure the supply cord is not trapped or damaged.
Do not locate multiple portable socket-outlets or portable power supplies at the rear of the appliance.
Keep ventilation openings, in the appliance enclosure or in the built-in structure, clear of obstruction.
Do not use mechanical devices or other means to accelerate the defrosting process, other than those recommended by the manufacturer.
Do not damage the refrigerant circuit.
Health risk from germs. Pay attention to hygiene and cleanliness when replacing the filter cartridge. Wear sterile disposable gloves when changing the filter. Clean the drip tray and surfaces regularly. Never touch the water outlet with your fingers or a cleaning cloth. Carry out a chemical cleaning of the device at least every 6 months. If your drinking water supplier has warned of microbiological contamination, it is imperative that you chemically clean the device after the warning has been lifted.
Health risk due to increased bacterial concentration in the water. If you have not used the device for more than 4 days, you must switch the device on, open the water supply inlet and carry out a chemical cleaning, see chapter
Health risk due to improperly repaired device. The device may only be repaired by trained specialist personnel.
Risk of injury from the cleaning agent. Follow the safety instructions for the cleaning agent and wear safety goggles and protective gloves when handling cleaning agents.
Damage to the device cooling unit. If the device has been stored or transported lying down, you must wait at least 24 hours before starting it up.
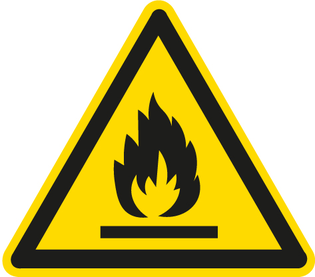
Risk of fire, flammable material
Flammable refrigerant is used in this unit.
If refrigerant escapes, keep ignition sources away from the device.This unit is not intended for use by persons (including children) with reduced physical, sensory or mental capabilities, unless they are supervised by a person who is responsible for their safety or have received instructions on how to use the unit from them.
Children must be supervised to prevent them from playing with the device.
A damaged power cable must be replaced by the manufacturer, his customer service or an equally qualified person in order to avoid danger.
The unit is used to dispense filtered, chilled and unchilled water of food quality for self-service operations.
The unit can be used in the following areas:
In staff kitchen areas of shops, offices and other work areas
In agriculture
In hotels, motels, bed and breakfasts and other accommodations
In catering and similar wholesale applications
The unit is equipped with a combination filter.
The unit must be set up in a frost-free room.
Do not use or place the unit outdoors.
Do not place, store or transport the unit horizontally.
Any type of improper use is prohibited.
The operating personnel are liable for damage resulting from incorrect use.
 The packing materials can be recycled. Please dispose of packaging in accordance with the environmental regulations.
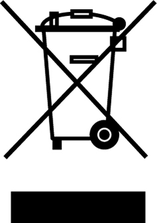 Electrical and electronic devices contain valuable, recyclable materials and often components such as batteries, rechargeable batteries or oil, which - if handled or disposed of incorrectly - can pose a potential danger to human health and the environment. However, these components are required for the correct operation of the device. Devices marked by this symbol are not allowed to be disposed of together with the household rubbish.
R-290 Contains greenhouse gas R290 - hermetically sealed device
Notes on the content materials (REACH)Current information on content materials can be found at: www.kaercher.de/REACH
Only use original accessories and original spare parts. They ensure that the appliance will run fault-free and safely.
Information on accessories and spare parts can be found at www.kaercher.com.
Description | Order no. |
|---|---|
Premium stand | 2.644-134.0 |
Basic stand | 2.644-221.0 |
Description | Order no. | |
|---|---|---|
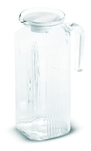 | Water jug, 1 l, glass, with plastic lid and KÄRCHER logo, dishwasher safe | 6.640-431.0 |
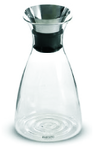 | Carafe, Eva Solo, 1 l, dishwasher safe | 0.017-575.0 |
Description | Order no. |
|---|---|
Rinsing cup 4 l | 6.640-341.0 |
Description | Order no. | |
|---|---|---|
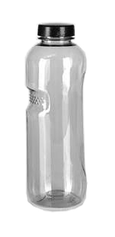 | Bottle 0.5 l, made of Tritan, dishwasher safe | 6.640-430.0 |
Bottle 0.75 l, made of Tritan, dishwasher safe | 6.640-512.0 | |
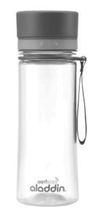 | Bottle 0.6 l, with mouthpiece and lid made of Tritan, dishwasher safe | 6.640-469.0 |
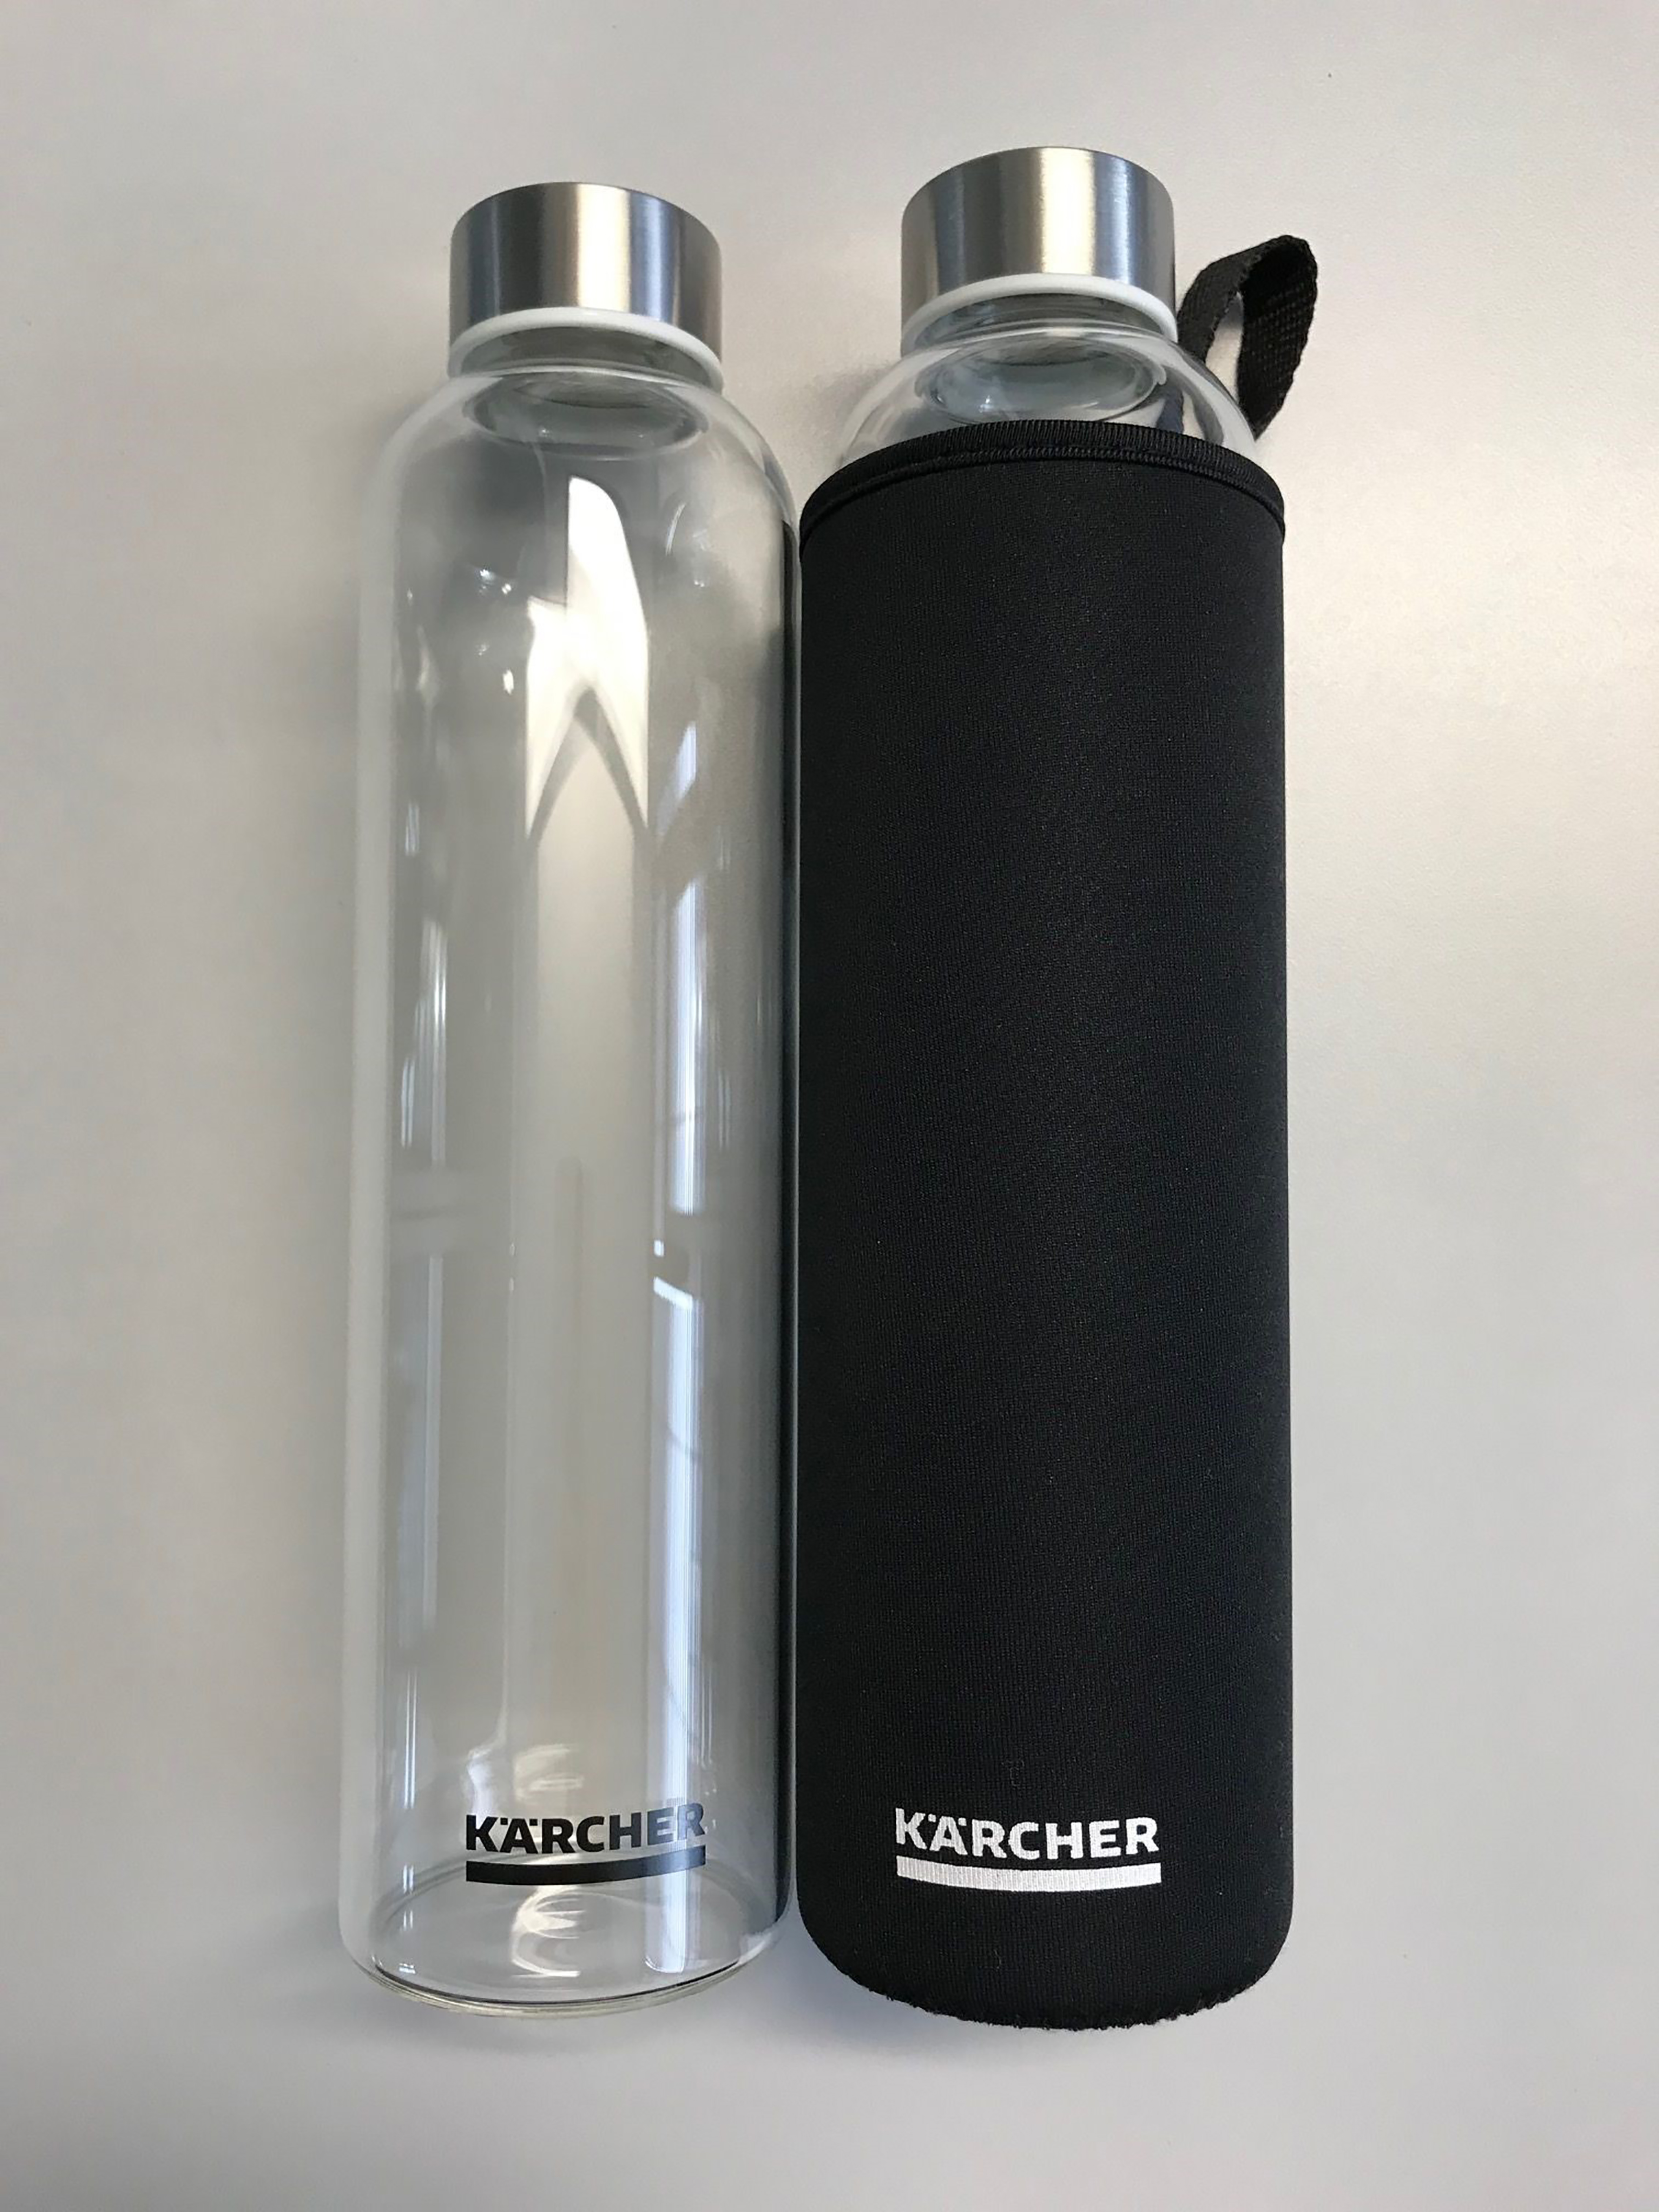 | High-quality borosilicate glass bottle 0.75 l, heat-resistant, clear, Ø 7 cm, height 26 cm with stainless steel lid and neoprene protective cover | 6.642-186.0 |
Description | Order no. |
|---|---|
Hard paper cup, also for hot drinks, 180 ml, without logo, 2500 pieces | 6.640-455.0 |
Hard paper cup, also for hot drinks, 180 ml, with KÄRCHER logo, 2500 pieces | 6.640-460.0 |
Plastic cup, 200 ml, without logo, 3000 pieces | 6.640-454.0 |
Plastic cup, 200 ml, with KÄRCHER logo, 3000 pieces | 6.640-453.0 |
Description | Order no. |
|---|---|
Error current circuit breaker 30 mA, 230 V, 50 Hz | 6.640-427.0 |
Aqua stop, leakage water detector with solenoid valve and brass screw connection G 3/4" | 6.640-291.0 |
Pressure reducer 1.5 - 6 bar - 1/2 | 6.640-625.0 |
Water Block, flood protection | 6.640-338.0 |
Backflow preventer, approved | 6.640-463.0 |
Description | Description | Order no. |
|---|---|---|
Hy-Pure-Plus filter | Combination filter consisting of active carbon and ultrafilter. Retains chlorine, heavy metals, residues from the tap, bacteria and viruses and ensures a good flavour. All minerals are retained in the water. | 2.644-200.0 |
Description | Description | Order no. |
|---|---|---|
Cleaning kit | For intake of the chemical detergent (Bevi Tabs alkali), reusable | 2.643-941.0 |
Bevi Tabs alkaline | Chemical detergent for the interior cleaning of the WPDs every six months, packaging unit 1 x 10 tablets | 6.295-891.0 |
Description | Description | Order no. |
|---|---|---|
CA 30 R | Ready-to-use surface cleaner, 0.5 l bottle | 6.295-686.0 |
Spray head for surface cleaner | When ordering CA 30 R for the first time, this reusable spray head is required for the spray bottle. | 6.295-723.0 |
When unpacking the device, check the contents of the box for completeness using the operating instructions. If any accessories are missing or in the event of any shipping damage, please notify your dealer.
During initial installation and any repairs that involve the replacement of accessory parts, make sure only parts approved by KÄRCHER (connection kit, filter, service cup) are used. These components have been tested and certified to ensure compliance with KÄRCHER Quality Standards. No other components may be used.
The power connection and water input pressure must correspond to the values in the technical data (see chapter “Technical data”).
Depending on local regulations, an approved backflow preventer must be installed.
Set up the unit on a level surface.
Mains plug and socket must always be freely accessible.
The trigger, the fuse and the water connection (rear of the unit) must be freely accessible. The minimum distance to the wall is 100 mm.
In the interest of reducing power consumption, the power supply can be switched off when the unit is not in use (e.g. using a timer clock).
Connect the unit only with the hose lines provided.
Do not use used hose lines.
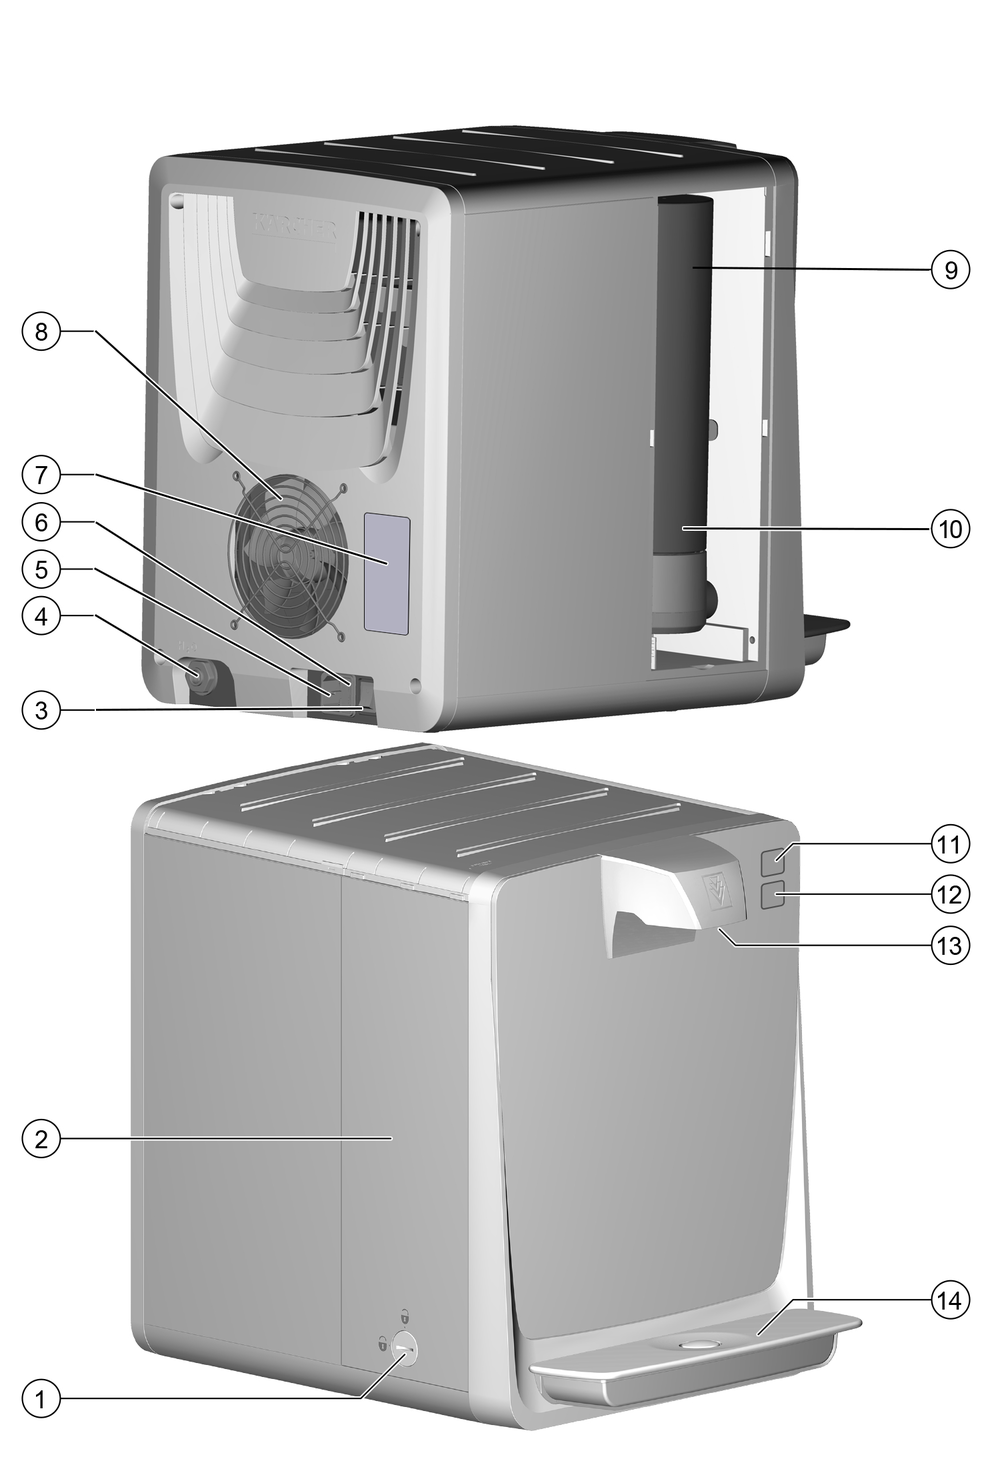
Connection diagram:
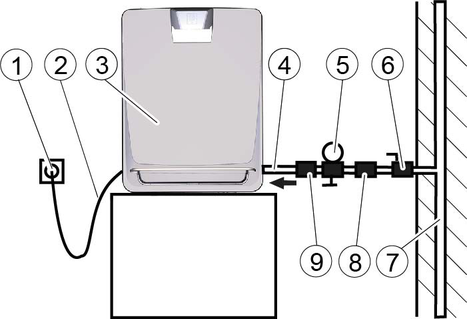
Connections:
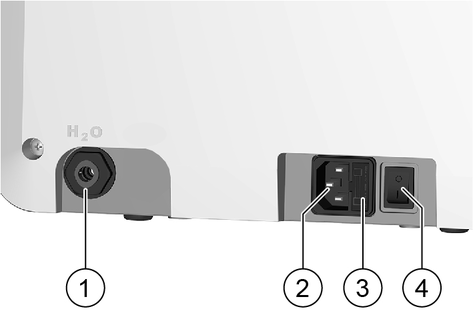
Connect the water supply hose to the water connection “H2O”.
Connect the water supply hose to the tap of the building installation (if necessary, connect additional components).
Connect the mains cable to the power supply.
Health risk through the entry of germs
When installing the filter cartridge, take special care to ensure hygiene and cleanliness.Always wear sterile disposable gloves when installing the filter.Open the filter cover latch.
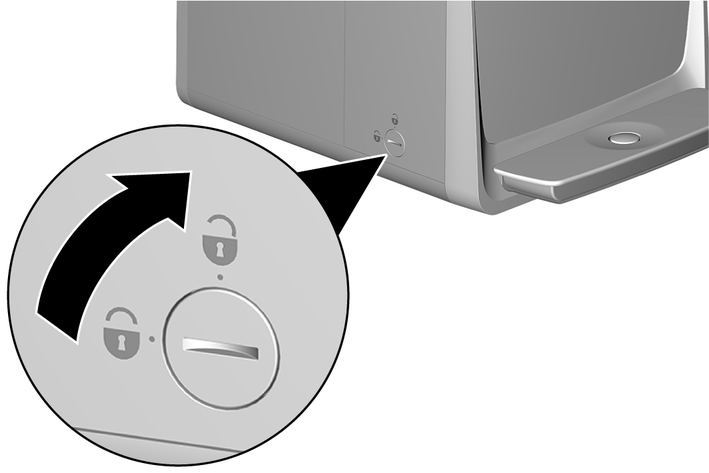
Remove the side filter cover.
Remove the service cup that was installed at the factory.
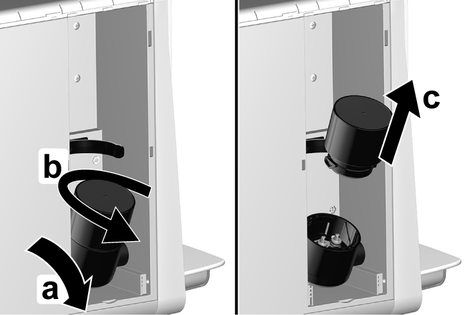
Pivot out the filter holder by max. 45°.
Turn the service cup anticlockwise.
Remove the service cup.
Insert the filter.
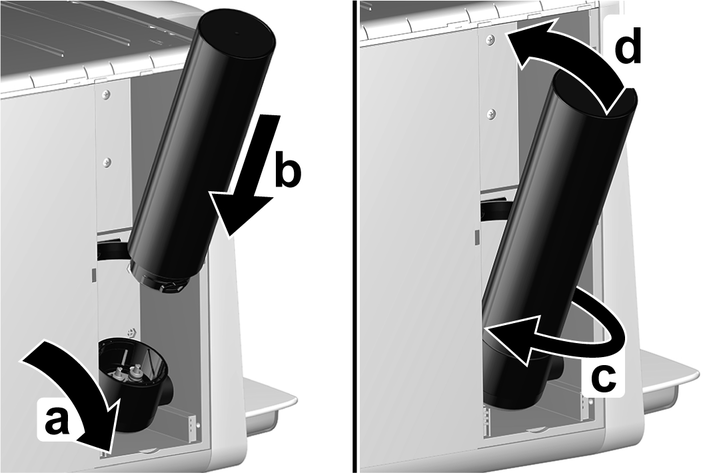
Pivot out the filter holder by max. 45°.
Insert the filter into the filter holder from above.
Turn the filter as far as it will go.
The filter is locked.
Pivot the filter with the filter holder into the device.
Fit the side filter cover.
Close the filter cover latch.
Open the water inlet.
Place a container under the water dispensing opening.
Press the “Chilled water” button repeatedly until a flushing time of 5 minutes is reached (approx. 10 - 15 litres).
Press the “Unchilled water” button for 1 minute (approx. 2 litres).
After every 60 seconds of uninterrupted water dispensing, the unit automatically interrupts dispensing.
Perform chemical cleaning (see chapter
The unit is ready for operation.
The water first flows from the water inlet through the combination filter (for a description of the filter, see chapter Consumables). Depending on the button pressed, the water then flows through the cooling module or directly to the water dispenser outlet. The entire water system must be cleaned chemically at regular intervals.
The illuminated sensor buttons are activated by a light touch.
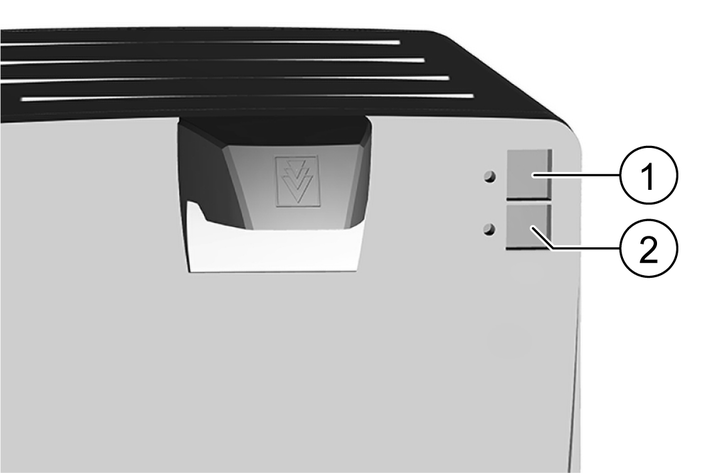
Place a container in the middle of the drip tray.
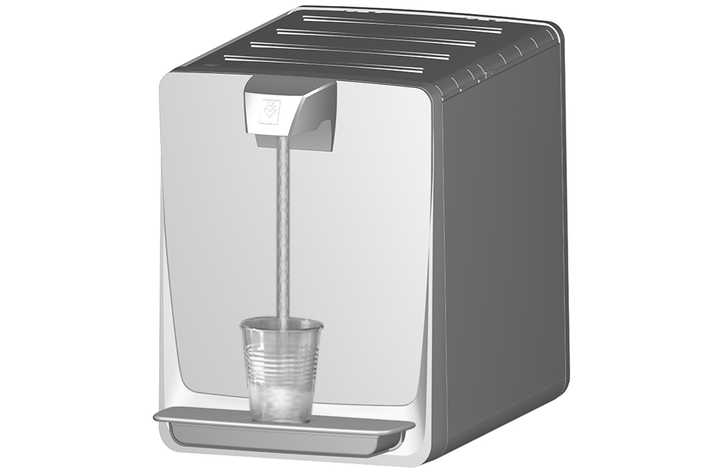
Press the button for the desired type of water until the container is full.
During this process, the pressed button lights up brighter.
If the unit is not used for more than 4 days:
Close the water inlet.
Switch off the unit.
Health risk
During decommissioning, the concentration of germs in the water in the device may increase.
If the device has not been used for a longer period of time (more than 7 days), the following activities must be carried out before you use the device again.Opening the water inlet
Switch on the device.
Depending on the duration of shutdown, carry out the following steps:
After a shutdown of more than 7 days:
Take at least 1 litre of each type of water and discard.
After shutdown of 8 to 28 days:
Take at least 5 litre of each type of water and discard.
Extraordinary chemical cleaning is recommended. (see chapter "Care and service")
After shutdown of longer than 28 days:
Remove the filter and insert the service cartridges.
Take at least 5 litre of each type of water and discard.
Perform a chemical cleaning (see chapter “Care and service”).
Carry out an extraordinary filter change.
Failure to observe the weight
Risk of injury and damage
Be aware of the weight of the device during transportation.Do not transport the device in a horizontal position.
When transporting the device in vehicles, secure it to prevent it from slipping or overturning in accordance with the respective valid guidelines.
The device must not be transported in a horizontal position.
Select a suitable packaging for transport and mark it on the outside with a conspicuous marking for vertical transport.
If possible, place a small wooden pallet under the shipping box.
Alternatively, take the device directly to a Kärcher service centre.
Failure to observe the weight
Risk of injury and damage
Be aware of the weight of the device during storage.Store the device in a frost-protected place.
Health risk due to improperly repaired device
Have the device repaired only by trained specialist personnel.Before performing any work on the unit:
Pressure relief of the unit.
Close the water inlet.
Place a container under the water dispensing opening.
Press the “Chilled water” button until no more water is dispensed.
Switch off the unit.
Pull out the mains plug.
Health risk through the entry of germs
When installing the filter cartridge, take special care to ensure hygiene and cleanliness.Always wear sterile disposable gloves when installing the filter.Close the water supply inlet.
Press the "Chilled water" button until no more water is dispensed.
Open the filter cover latch.
Remove the side filter cover.
Remove the filter to be replaced.
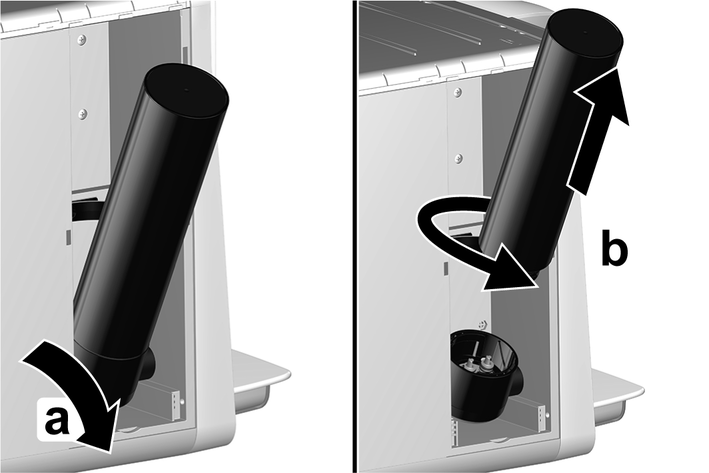
Pivot out the filter with the filter holder by max. 45°.
Unscrew and remove the filter.
Unpack the new filter.
Insert the new filter.
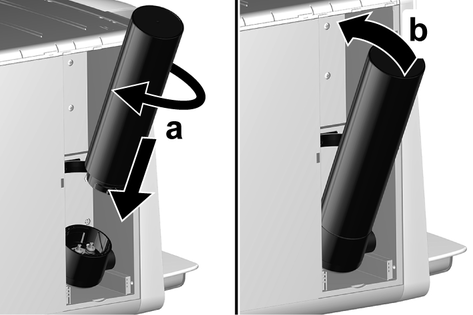
Fit the filter into the filter holder and turn it as far as it will go.
The filter is locked.
Pivot the filter with the filter holder into the device.
Fit the side filter cover.
Close the filter cover latch.
Plug the mains plug into the socket.
Place a container under the water dispenser.
Open the water inlet.
Press the "Chilled water" button repeatedly until a rinsing time of 5 minutes has been reached (approx. 10 - 15 litres).
The device automatically stops dispensing after 60 seconds of continuous water dispensing.
Carry out chemical cleaning (see chapter
The outlet water is cleaning water
The dispensed cleaning water is not suitable for consumption.Chemical cleaning must be carried out after initial Start-Up and at least every 6 months. The same applies after a shutdown for more than 7 days or an extraordinary filter change. The cleaning kit is required for chemical cleaning (see chapter "Consumables").
The chemical cleaning process takes approx. 45 minutes.
Close the water inlet.
Press the button for “chilled water” until no more water is dispensed.
Switch off the device.
Remove the combi filter (see chapter "Replacing the filter").
Insert the service cup.
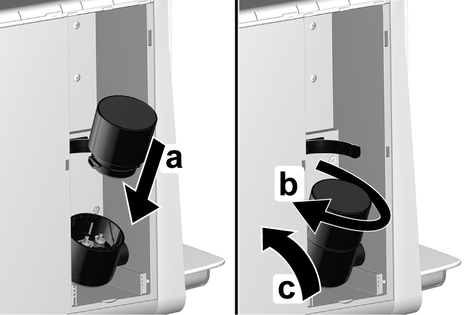
Swivel the filter holder out by max. 45°.
Insert the service cup.
Turn the service cup clockwise.
Swivel the filter holder into the device.
Remove the water supply line.
Prepare the cleaning kit.
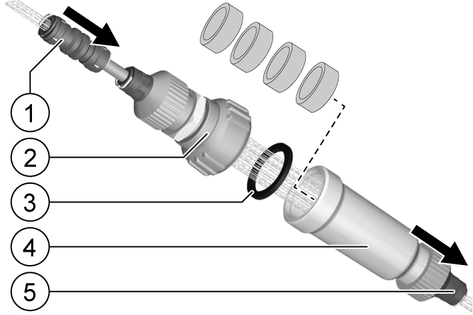
Unscrew the cleaning kit.
Insert the 4 cleaning tablets into the cleaning kit.
Screw the cleaning kit together, ensuring that the sealing ring is correctly seated.
Connect the cleaning kit to the device input.
Connect the water supply line to the cleaning kit.
Place the cleaning kit in a vertical position if possible.
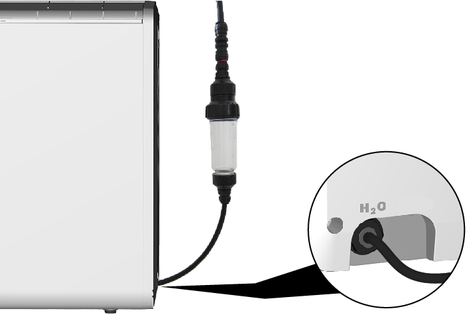
Remove the drip tray.
Place a suitable container with a capacity of at least 1 litre under the water outlet.
Plug the mains plug into the socket.
Open the water inlet.
Switch the device on.
Carry out the following steps extremely carefully to ensure the greatest possible effectiveness of the chemical cleaning.
The cleaning agent used for chemical cleaning is equipped with a blue colour indicator. The colouration of the water that is output indicates the concentration and effectiveness of the cleaning agent.
A small amount of foam is created during the cleaning process. This is caused by the system and is normal.
Perform cleaning.
Press the "Chilled water" button until the device stops dispensing water after 60 seconds.
Wait 60 seconds to allow the detergent to dissolve.
Repeat this process (rinse for 60 seconds and wait 60 seconds) twice in total.
Empty the drip tray after each dosing process.
Press the “Unchilled water” button for 30 seconds.
The dosing process is complete. The contact time of the detergent begins. It should be at least 15 min and can be extended as required.
Wait at least 15 minutes for the detergent to take effect.
Close the water inlet.
Press any button until no more water is dispensed.
Switch off the device.
Remove the cleaning kit.
Reconnect the water supply hose to the device.
Remove the service cup and reinsert the filter.
You can briefly interrupt the rinsing process at any time, e.g. to empty the rinsing cup.
Place a suitable container with a capacity of at least 1 litre under the water outlet.
Open the water inlet.
Switch the unit on.
Press the “Chilled water” button until the blue colour is no longer visible.
Then rinse at least another 4 litres.
Press the “Unchilled water” button until the blue colour is no longer visible.
Then rinse at least another 2 litres.
The unit is ready for operation.
To be able to test the effectiveness of the chemical cleaning, samples should be collected immediately after completion of chemical cleaning under observance of the rules for microbiological water analysis and these should be evaluated by an accredited laboratory.
The float signals that the drip tray is full. A red marking ring on the float becomes visible when the maximum filling level has been reached.
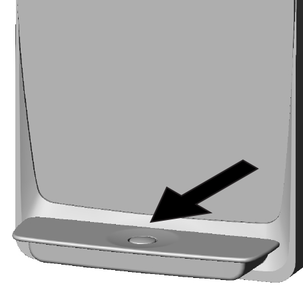
Carefully remove and empty the full drip tray.
Check the drip tray daily for soiling, clean if necessary.
Reinstall the drip tray.
The device shows "Ready for use" but does not dispense water. All buttons are illuminated.
Cause:
The water supply is interrupted.
Remedy:
Ensure a correct water supply.
Check the shut-off devices.
If the fault persists, contact the service department.
The device is not working. The buttons do not light up.
Cause:
The power supply is faulty.
Remedy:
Check the power supply.
The device is not working. The buttons do not light up.
Cause:
The fuse is defective.
Remedy:
Remove the cover of the fuse next to the device switch, replace the fuse. If the fuse blows again, switch off the device, contact the service department.
The dispensed water is not cooled, even though the "Chilled water" button was pressed
Cause:
The cooling module has not reached its nominal temperature.
Remedy:
Wait 20 to 40 minutes and check it again.
If the cooling function exhibits permanent failure:
Switch off the device.
Contact the service department.
Cause:
Malfunction in temperature regulation.
Remedy:
Contact Service.
The warranty conditions issued by our relevant sales company apply in all countries. We shall remedy possible malfunctions on your appliance within the warranty period free of cost, provided that a material or manufacturing flaw is the cause. In a warranty case, please contact your dealer (with the purchase receipt) or the next authorised customer service site.
Further information can be found at: www.kaercher.com/dealersearch
Further warranty information (if available) can be found in the service area of your local Kärcher website under "Downloads".
Device performance data | |
Working voltage of the battery | 220-240 V |
Power frequency | 50 Hz |
Power protection (slow-blowing) | 6 A |
Max. power input | 200 W |
Water supply pressure | 0,15 -0,6 (1,5-6) MPa (bar) |
Water supply temperature | 5-30 °C |
Ambient temperature | 5 - 32 °C |
Water dispenser (depending on supply pressure and filter status) | |
Chilled water | 120 l/h |
Unchilled water | 120 l/h |
Min. temperature of chilled water | 6 °C |
Dimensions and weights | |
Width | 300 mm |
Depth | 440 mm |
Height | 395 mm |
Weight | 19 kg |
Time & date | Performed |
|---|---|
Daily | Remove and clean the drip tray. |
After an overnight device standstill, dispense 0.5 l of each type of water and dispose of it. | |
Weekly, more often if necessary | Clean the outside of the device, clean the drip tray with hot water or in a dishwasher. Do not use cleaning agents containing alcohol, acidic components or scouring agents for cleaning plastic surfaces. |
Half-yearly | If the water quality is bad, replace the Hy-Pure-Plus filter. |
Perform chemical cleaning, see chapter <fct:ExternalLink> .</fct:ExternalLink> | |
Annually | Replace Hy-Pure-Plus filter. |
The decisive factor for the filter change interval is the amount of water dispensed and the water quality of the inlet water. | |
Device / serial number: | Place of installation: | ||||||
Device type: WPD 55 | Date of installation | ||||||
Installation by: | |||||||
Date | Technician | Operating hours | Filter change | Other parts | Chemical Cleaning | Remarks | Signature Technician |
The combi-filter must be rinsed until the water is particle-free and has a neutral odour. | |||||||