RVC 3 Base
97784780 (08/25)
97784780 (08/25)
 Read the original instructions before using the device for the first time and act in accordance with it. Keep the original instructions for future reference or for future owners.
Indication of an imminent threat of danger that will lead to severe injuries or even death.
Indication of a potentially dangerous situation that may lead to severe injuries or even death.
Indication of a potentially dangerous situation that may lead to minor injuries.
Indication of a potentially dangerous situation that may lead to damage to property.
Only connect the device to an AC power source. The voltage indicated on the type plate must match the mains voltage of the power source.
For safety reasons we recommend operating the device only via a fault current protection switch (maximum 30 mA).
Never touch the mains plug and socket with wet hands.
Danger of explosion. Do not charge any non-rechargeable battery.
Persons with reduced physical, sensory or mental capabilities and persons lacking experience and knowledge may only use the appliance if they are properly supervised, have been instructed on use of the appliance safely by a person responsible for their safety, and understand the resultant hazards involved.
Children from the minimum age of 8 may use the appliance if they are properly supervised or have been instructed in its use by a person responsible for their safety, and if they have understood the resultant hazards involved.
Children must be supervised to prevent them from playing with the appliance.
Children may only perform cleaning work and user maintenance under supervision.
The appliance contains electrical components - do not clean the appliance under running water.
Switch off the device immediately and remove the mains plug before performing any care and service work.
Only connect the device to an electrical connection which has been set up by a qualified electrician as per IEC 60364‑1.
Check that the mains voltage corresponds with the voltage stated on the type plate of the charger.
The appliance contains electrical components - do not clean the appliance under running water.
Short circuit hazard. Keep conductive objects (e.g. screwdrivers or similar tools) away from the charging contacts.
Short circuit hazard. Only clean the charging contacts of the charging station dry.
Check the mains cable for damage each time before every operation. Do not use a damaged mains cable. If damaged, replace the mains cable with an approved replacement. You can get a suitable replacement from KÄRCHER or one of our service partners.
Applies to RVC 3 Comfort devices: Only the cleaning robot model “RVC 3 Comfort” may be charged
Only use the charging station in countries with a mains voltage of 220-240V.
Use the charging station indoors only.
Do not place the charging station near heat sources, e.g. heaters.
Store the charging station indoors only, in a cool, dry place.
Charge the cleaning robot at least once a month to avoid deep discharge of the battery.
Switch off the charging station before all care and maintenance work.
Do not place objects on the device or sit on it.
 | Read the operating instructions and all safety instructions before operating the device for the first time. |
 | Protect the device from moisture. Store the device in a dry place. Do not subject the device to rain. The device is only suitable for indoor use. |
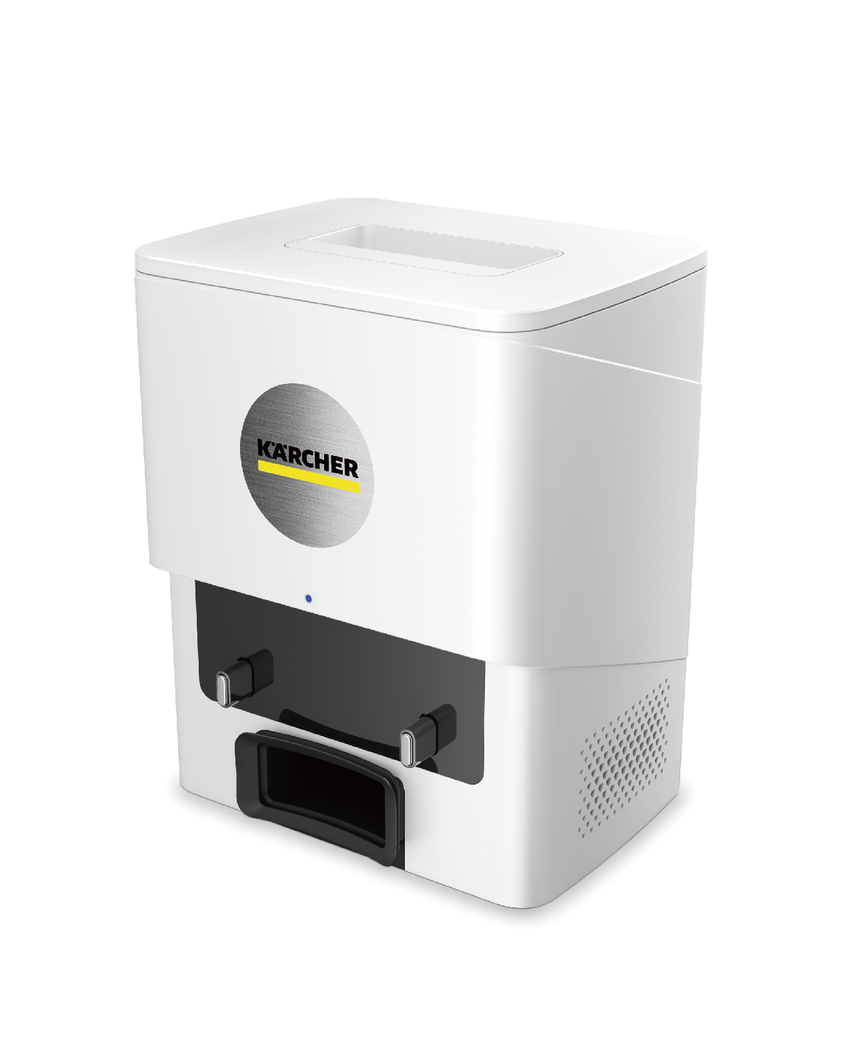
The unit is designed as a suction and charging station for use with the KÄRCHER RVC 3 Comfort cleaning robot.
This device has been developed for use in private households and is not intended for the load imposed by commercial use.
 The packing materials can be recycled. Please dispose of packaging in accordance with the environmental regulations.
 Electrical and electronic devices contain valuable, recyclable materials and often components such as batteries, rechargeable batteries or oil, which - if handled or disposed of incorrectly - can pose a potential danger to human health and the environment. However, these components are required for the correct operation of the device. Devices marked by this symbol are not allowed to be disposed of together with the household rubbish.
Current information on content materials can be found at: www.kaercher.de/REACH
Only use original accessories and original spare parts. They ensure that the appliance will run fault-free and safely.
Information on accessories and spare parts can be found at www.kaercher.com.
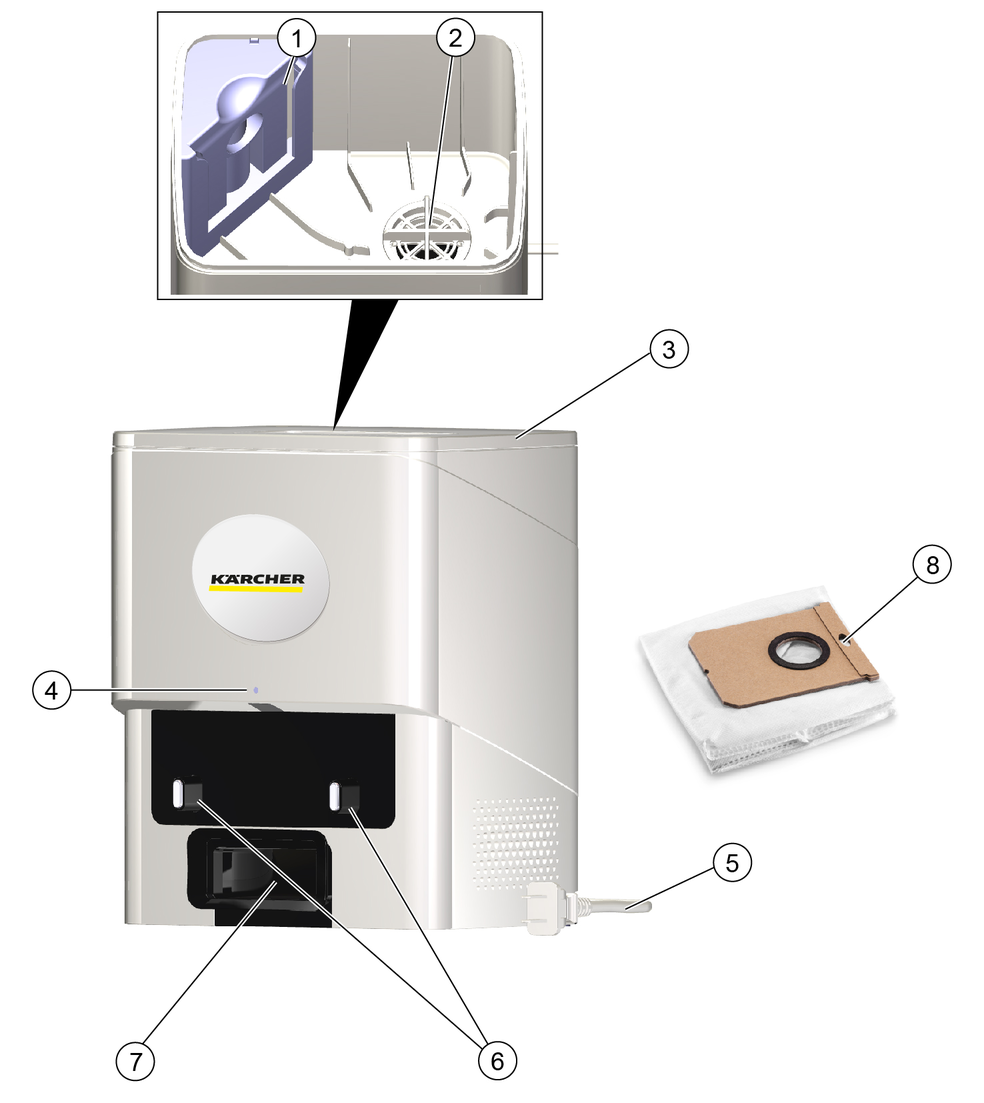
The scope of delivery for the appliance is shown on the packaging. Check the contents for completeness when unpacking. If any accessories are missing or in the event of any shipping damage, please notify your dealer.
The unit functions as a charging and suction station for the RVC 3 Comfort cleaning robot.
As a charging station, the functionality is identical to the charging station supplied with the cleaning robot.
In addition, the station is used for suction. Suction starts when the cleaning robot has completed its cleaning task. During the suction process, a flap in the dust container of the cleaning robot is opened by the vacuum created and the dirt is transported into the filter bag of the station.
Suction can only take place under the following conditions:
The cleaning robot is in the station.
A filter bag is suspended in the station.
The inserted filter bag is not full.
The station cover is closed.
LED display | Status |
|---|---|
Flashes blue | The cleaning robot is charging. |
Lights up blue for 5 seconds | The cleaning robot is fully charged. |
Lights up blue | The cleaning robot is cleaning / Suction is in process. |
Lights up red | A fault has occurred. |
Off | The cleaning robot is charged and in sleep mode or “Do not disturb” mode. |
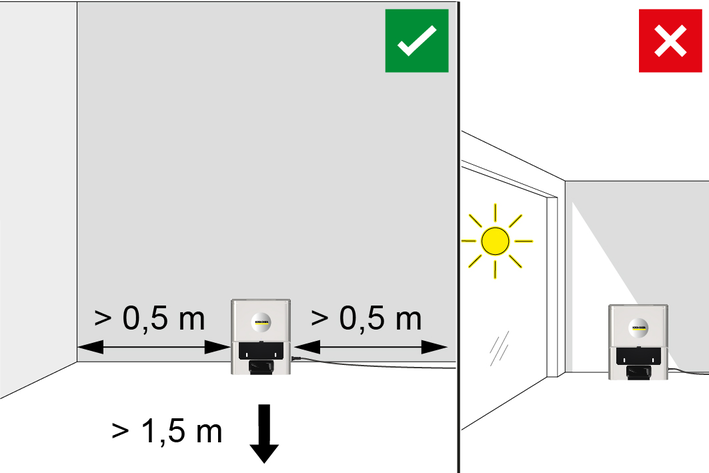
Select the location so that the cleaning robot can easily reach the charging station.
Ensure a distance of at least 0.5 m to the left and right of the charging station and a distance of at least 1.5 m in front of the charging station.
The location must not be exposed to direct sunlight.
Set up the charging station.
Connect the mains plug.
Risk of injury or damage due to the weight of the device!
Injury and damage.
Be aware of the weight of the device during transport and storage.Risk of injury or damage due to the weight of the device!
Injury and damage.
Be aware of the weight of the device during transport and storage.Open the cover.
Pull the full dust bag upwards to remove the bag.
If necessary, clean the interior and the motor protection filter of the station.
Unfold the new dust bag and push it into the support from above.
Close the cover again.
Clean the filter of the dust container (see RVC 3 operating instructions).
Malfunctions often have simple causes that you can remedy yourself using the following overview. When in doubt, or in the case of malfunctions not mentioned here, please contact your authorised Customer Service.
Battery does not charge
Cause:
Charging contacts dirty.
Remedy:
Wipe the charging contacts on both the charging station and the cleaning robot with a dry cloth.
Cause:
Ambient temperature below 0 °C or above 35 °C.
Remedy:
Use the cleaning robot at temperatures above 0 °C and below 35 °C.
Cause:
Station is not plugged in.
Remedy:
Plug in the power cable of the station.
The cleaning robot is not returning to the charging station
Cause:
Battery is discharged.
Remedy:
Manually place the cleaning robot on the charging station and let it charge completely.
Cause:
The cleaning robot is too far away from the charging station.
Remedy:
Move the cleaning robot closer to the charging station.
Manually place the cleaning robot on the charging station.
Cause:
Not enough space around the charging station.
Remedy:
Ensure that there is sufficient space around the charging station, see chapter Setting up the station.
Cause:
There are too many obstacles around the charging station.
Remedy:
Place the charging station in a more open area, see chapter Setting up the station.
Cause:
The cleaning robot remaps its environment when it has been moved over a longer distance.
Remedy:
Manually place the cleaning robot on the charging station.
Cause:
The cleaning robot was not started from the charging station. In this case, it only returns to the place from which it was started.
Remedy:
Manually place the cleaning robot on the charging station.
Cause:
Station is not plugged in.
Remedy:
Plug in the power cable of the station.
Suction does not start or does not work properly
Cause:
Cleaning robot not correctly on station.
Remedy:
Place the cleaning robot on the station manually.
Cause:
The time since the last suction is too short.
Remedy:
Try again after 2 minutes.
Cause:
Dust bag not present or inserted incorrectly.
Remedy:
Insert the dust bag or check that the bag is fitted correctly.
Cause:
The cover of the suction station is open.
Remedy:
Close the cover of the station completely.
Cleaning robot picks up less dirt
Cause:
Dirt on the exhaust air flap in the dust container.
Remedy:
Remove and clean the dust container.
The warranty conditions issued by our relevant sales company apply in all countries. We shall remedy possible malfunctions on your appliance within the warranty period free of cost, provided that a material or manufacturing flaw is the cause. In a warranty case, please contact your dealer (with the purchase receipt) or the next authorised customer service site.
Further information can be found at: www.kaercher.com/dealersearch
Further warranty information (if available) can be found in the service area of your local Kärcher website under "Downloads".
Dimensions and weight of charging station | |
Weight | 1.8 kg |
Length x width x height | 21 x 16.5 x 26 cm |
Device performance data | |
Filter bag capacity | 4 l |
Electrical connection | |
Nominal voltage (input) | 220-240 V |
Frequency | 50-60 Hz |
Nominal voltage (output) | 20 V |
Rated current (output) | 0.8 A |
Rated power (suction) | 400 W |
Plug the charging cable of the charging and cleaning station into the socket.
Place the device into the charging and cleaning station. The LED display shows the current charging state of the battery.
The battery is fully charged after 4.5 hours. After 10 minutes of full charge, the LED display turns off.